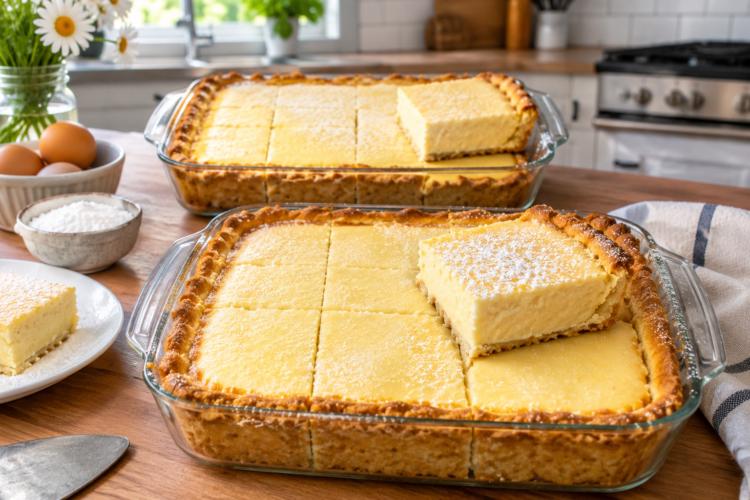
Torta della Nonna is a traditional Italian dessert made with delicate buttery pastry, smooth vanilla pastry cream, a hint of fresh lemon zest, and a generous sprinkling of pine nuts. Its name translates to “Grandmother’s Cake,” and it is widely enjoyed as a comforting homemade dessert, particularly after a family meal. This classic Italian custard tart combines the richness of a creamy filling with the tender texture of a lightly crisp pastry shell, creating a beautiful balance of flavors in every slice.
If you enjoy traditional European desserts, this Torta della Nonna recipe is a wonderful addition to your baking collection. Although it looks elegant enough for a special occasion, the preparation involves familiar ingredients and straightforward techniques. The pastry is made with flour, butter, sugar, eggs, and lemon zest, while the filling uses milk, egg yolks, vanilla, sugar, and flour. Once assembled, the tart is baked until the crust develops a delicate golden color and the pine nuts add a lovely finishing touch.
What Makes Torta della Nonna Special?
The appeal of Torta della Nonna comes from its simple ingredients and carefully balanced textures. Unlike cakes that rely on multiple layers of sponge, frosting, or elaborate decorations, this Italian dessert brings together two essential components: a tender shortcrust pastry and a rich homemade custard. The pastry provides a buttery, slightly crumbly exterior, while the vanilla filling remains smooth and creamy. Lemon zest adds a subtle citrus aroma that keeps the dessert from tasting overly heavy.
Another distinctive feature is the traditional pine nut topping. These small nuts add a delicate nutty flavor and a pleasant contrast to the soft custard and pastry. A light dusting of powdered sugar gives the finished tart a classic bakery-style appearance without requiring complicated decoration. The result is a dessert that feels rustic and refined at the same time, making it suitable for Sunday lunch, holiday gatherings, dinner parties, or an afternoon coffee break.
The Story Behind This Traditional Italian Dessert
Despite its name, Torta della Nonna is not necessarily a recipe passed down through every Italian grandmother’s kitchen. The dessert is commonly associated with Tuscany and is often linked to the Italian tradition of creating satisfying sweets from everyday pantry ingredients. Its exact origins are sometimes told differently, but the dish became popular for its appealing combination of pastry and custard. Today, it is recognized as a beloved Italian tart that appears in bakeries, restaurants, and home kitchens.
The recipe reflects an approach to baking that values quality ingredients rather than complicated decoration. Milk, eggs, flour, butter, sugar, and vanilla form the foundation of the dessert, while lemon zest and pine nuts provide its recognizable character. The preparation takes a little patience because the pastry and filling need time to cool, but those steps help create a tart that slices neatly and delivers a balanced flavor. It is an excellent recipe for anyone interested in exploring classic Italian baking at home.
Why You Will Love This Torta della Nonna Recipe
One of the best reasons to make this homemade Italian custard tart is its combination of familiar ingredients and impressive results. You do not need specialized pastry equipment beyond a food processor if you want to make the dough quickly, and even that appliance is optional. The custard is prepared on the stovetop, and the pastry comes together with basic mixing techniques. With a little care during assembly, the recipe produces a dessert that looks inviting without requiring professional baking experience.
The flavor is another reason this tart deserves a place in your recipe collection. The vanilla custard tastes creamy and gently sweet, while the lemon zest gives the pastry a fresh aroma. Butter contributes richness, and the pine nuts introduce a subtle toasted flavor. Each component complements the others rather than competing for attention. Because the tart is satisfying without being heavily frosted, it works particularly well as the final course after a family dinner or a relaxed weekend meal.
This recipe is also convenient for entertaining because much of the preparation can be completed ahead of time. The pastry cream can be cooked and chilled in advance, and the dough can be refrigerated until you are ready to assemble the tart. Preparing these elements separately makes the baking process easier to manage. When you are ready to serve, a light coating of powdered sugar completes the presentation and makes each slice look attractive on a dessert plate.
Understanding the Ingredients for Italian Custard Tart
Milk and Vanilla Extract
Whole milk gives the pastry cream its creamy texture and full flavor. It provides the liquid base for the custard while allowing the egg yolks and flour to create a thick, smooth filling. Vanilla extract adds a familiar sweet aroma that pairs beautifully with the buttery crust. Heating the milk with vanilla before combining it with the egg mixture helps distribute the flavor throughout the filling. For the most consistent results, use the quantities listed in the recipe card rather than estimating them.
Egg Yolks, Egg, and Sugar
Egg yolks are essential to the custard because they contribute richness, color, and a smooth texture. They are also part of the pastry mixture, where they help bind the ingredients together. The additional whole egg and egg yolk in the crust give the dough structure and help it hold its shape during baking. Granulated white sugar sweetens both components and balances the buttery pastry with the creamy filling. Whisking the yolks and sugar thoroughly before adding the milk helps create a more even custard mixture.
All-Purpose Flour
All-purpose flour serves two different purposes in this Torta della Nonna recipe. In the pastry cream, a measured amount helps thicken the milk and egg mixture as it cooks. In the crust, flour provides the structure needed to hold the filling securely. Measuring the flour carefully is important because too little can leave the custard loose or make the pastry difficult to handle, while too much can produce an unnecessarily firm texture. Use a light hand when bringing the dough together so the finished crust remains tender.
Cold Unsalted Butter
Cold unsalted butter is responsible for much of the crust’s delicate texture and rich flavor. When combined with the flour, it creates a crumb-like mixture that forms a tender pastry after baking. Cutting the butter into small pieces makes it easier to distribute evenly through the flour. Keep the butter cold until you are ready to prepare the dough, and avoid working the mixture excessively. If the butter becomes too warm, the pastry may turn sticky and become more difficult to roll out neatly.
Lemon Zest, Baking Powder, and Salt
Finely grated lemon zest gives the shortcrust pastry a light citrus fragrance that complements the vanilla filling. Use only the colored outer peel when zesting the lemon, since the white layer underneath can taste bitter. A small amount of baking powder provides gentle lift, while a pinch of salt balances the sweetness and enhances the butter’s flavor. Although these ingredients appear in modest quantities, they help give the pastry its characteristic taste and texture.
Pine Nuts and Powdered Sugar
Pine nuts are the traditional topping for Torta della Nonna and provide a delicate nutty flavor. They also create a recognizable appearance that distinguishes this dessert from other custard tarts. Because pine nuts can brown quickly in a hot oven, soaking them briefly in water before baking can help reduce the risk of burning. Powdered sugar is added after baking to give the tart a simple, elegant finish. Dust it lightly over the cooled dessert so the surface remains attractive when the tart is sliced.
How to Make Torta della Nonna
Step 1: Prepare the Vanilla Pastry Cream
Begin by warming the milk and vanilla extract in a medium saucepan until the milk just reaches the boiling point. Remove it from the heat and allow it to cool slightly. In a separate bowl, whisk the egg yolks and granulated sugar until the mixture looks pale and creamy, then stir in the flour. Gradually pour the warm milk into the egg mixture while whisking continuously. Adding the milk slowly raises the temperature of the eggs gently and helps prevent them from curdling.
Step 2: Cook and Cool the Custard
Strain the combined mixture back into the saucepan to remove any lumps and create a smooth filling. Return the pan to medium heat and stir continuously with a whisk until the custard thickens. Allow it to bubble gently for approximately one full minute so the flour cooks properly and does not leave a raw, starchy taste. Transfer the finished pastry cream to a clean bowl, cover the surface directly with plastic wrap, and leave it to cool completely before assembling the tart.
Step 3: Make the Shortcrust Pastry
Place the all-purpose flour, lemon zest, baking powder, salt, and cold butter in a food processor. Pulse the ingredients until the butter is distributed throughout the flour and the mixture resembles breadcrumbs. Add the granulated sugar, whole egg, and egg yolk, then process briefly until the dough begins to gather around the sides of the bowl. The mixture should hold together without becoming overly soft. Avoid prolonged processing because excessive handling can make the pastry less tender.
Step 4: Chill the Dough
Transfer the pastry mixture to a lightly floured work surface and bring it together with gentle movements. Knead only as much as necessary to form a cohesive dough, then flatten it into a thick round. Wrap it securely in plastic wrap and refrigerate for one hour. Chilling allows the butter to firm up and makes the dough easier to roll without excessive sticking. It also helps the pastry maintain its shape during baking, which is especially useful when preparing a filled tart.
Step 5: Line the Tart Pan
Preheat the oven to 350°F (180°C) and grease a 10-inch (25 cm) tart pan with a removable base. Divide the chilled dough into two portions, keeping one portion slightly larger if that makes lining the pan easier. Roll out the first portion on a lightly floured surface until it is large enough to cover the base and sides of the pan. Carefully transfer the pastry, press it gently into place, and trim any excess dough without stretching it.
Step 6: Add the Pastry Cream Filling
Make sure the custard has cooled completely before filling the pastry shell. Spoon the vanilla pastry cream into the prepared base and spread it evenly with a spatula. Leave the edges of the pastry clean enough to help the top layer join securely. There is no need to blind-bake the crust for this recipe because the filling is sufficiently thick when prepared correctly. Using cooled custard also helps the pastry remain manageable during assembly and prevents unnecessary softening before the tart goes into the oven.
Step 7: Cover the Tart and Add Pine Nuts
Roll out the remaining pastry and gently place it over the custard filling. Bring the edges together and press them carefully to seal the tart, trimming any excess dough as needed. Handle the pastry gently to avoid tearing it or pressing too firmly against the filling. Scatter the pine nuts over the top, distributing them evenly so each portion has a little nutty flavor. If desired, soak the pine nuts in water for around five minutes before using them to help prevent excessive browning.
Step 8: Bake Until Golden
Place the assembled tart in the preheated oven and bake for approximately 40 minutes, or until the pastry is cooked through and the top develops a light golden color. Check the tart during the final part of baking because oven temperatures can vary. If the top becomes too dark before the pastry is fully baked, loosely cover it with aluminum foil and continue cooking. The exact appearance may differ slightly depending on your oven and the thickness of the rolled pastry.
Step 9: Cool, Dust, and Serve
Remove the baked Torta della Nonna from the oven and allow it to cool before attempting to slice it. Cooling gives the custard time to settle and makes it easier to achieve neat portions. Once the tart is cool, dust the surface lightly with powdered sugar. Release it carefully from the removable tart pan and transfer it to a serving plate. Cut into 12 portions and serve as a dessert after lunch or dinner, or enjoy a slice alongside coffee or tea.
Tips for Making the Best Torta della Nonna
Add the Warm Milk Gradually
One of the most important steps in making smooth Italian pastry cream is tempering the egg yolks. Pouring hot milk into the eggs too quickly can cause them to cook unevenly and form unwanted lumps. Instead, add the warm milk in a slow, steady stream while whisking constantly. This simple technique helps the ingredients combine smoothly and makes it easier to achieve the creamy consistency that gives Torta della Nonna its distinctive character.
Cook the Custard for a Full Minute
Once the pastry cream has thickened, allow it to bubble gently for approximately one minute while stirring. This step helps cook the flour thoroughly and improves the texture of the finished filling. Keep stirring so the custard does not stick to the bottom of the saucepan or develop lumps. After cooking, transfer it to a clean bowl and press plastic wrap directly against the surface to prevent a skin from forming as it cools.
Avoid Overworking the Pastry Dough
Shortcrust pastry should be handled gently rather than kneaded like bread dough. Excessive mixing can develop the gluten in the flour and make the baked crust firmer than desired. Stop working the mixture as soon as it comes together into a cohesive dough. If it feels sticky, add a small amount of flour to the work surface rather than incorporating large amounts into the dough. Keeping the pastry chilled also makes rolling and shaping much easier.
Prevent the Pine Nuts From Burning
Pine nuts have a delicate flavor, but their small size means they can brown quickly during baking. Soaking them in water for about five minutes before placing them on the tart can help reduce the risk of excessive browning. Keep an eye on the top during the final baking period. If the pine nuts or pastry begin to darken too quickly, loosely cover the tart with aluminum foil and allow it to finish baking.
Delicious Variations to Try
Chocolate Hazelnut Torta della Nonna
For a chocolate-inspired variation, spread a few tablespoons of chocolate hazelnut spread, such as Nutella, over the pastry base before adding the cooled custard. Spread it in a thin, even layer so the chocolate flavor complements rather than overwhelms the vanilla filling. This variation adds a rich chocolate note to the traditional Italian tart while retaining the buttery pastry and pine nut topping that make the original dessert recognizable.
Chocolate Chip Custard Tart
Mini chocolate chips offer another easy way to change the flavor of this classic dessert. Allow the pastry cream to cool completely, then stir the chocolate chips through the filling before spooning it into the prepared crust. The small pieces add bursts of chocolate throughout the creamy center. Use this variation when serving guests who enjoy chocolate desserts but still want the familiar texture of a traditional Italian custard tart.
Two-Tone Chocolate and Vanilla Filling
For a more distinctive dessert, divide the hot pastry cream into two equal portions after cooking. Stir approximately one-quarter cup of chocolate chips into one portion until the chocolate melts and the mixture becomes smooth. Leave the other portion vanilla flavored, then use both fillings to create a two-tone effect. This variation introduces a deeper cocoa flavor while preserving the creamy texture and delicate sweetness associated with Torta della Nonna.
Frequently Asked Questions About Torta della Nonna
Can I Make Torta della Nonna Ahead of Time?
Yes, preparing the components ahead of time can make baking more convenient. The pastry dough and pastry cream can both be made the day before and stored separately in the refrigerator. Keep the custard covered directly on its surface to prevent a skin from forming. When you are ready to assemble the tart, allow the dough to sit at room temperature for approximately 15 minutes if it is too firm to roll comfortably.
Can I Make the Pastry Without a Food Processor?
A food processor is convenient, but it is not essential for this recipe. Place the flour, lemon zest, baking powder, salt, and cold butter in a mixing bowl. Rub the butter into the dry ingredients with your fingertips until the mixture resembles fine breadcrumbs. Add the sugar, whole egg, and egg yolk, then combine gently until the ingredients form a dough. Work quickly enough to prevent the butter from becoming too warm.
Does the Tart Crust Need to Be Blind-Baked?
No, blind baking is not necessary for this Torta della Nonna recipe. The pastry cream is thickened on the stovetop before it is added to the crust, so it does not have the same watery consistency as some uncooked pie fillings. Assemble the tart with completely cooled custard and bake according to the recipe instructions. Ensuring that the filling is properly cooked and thickened beforehand helps the tart bake evenly.
How Should I Store Leftover Torta della Nonna?
Because the filling contains milk and eggs, leftover tart should be refrigerated rather than left at room temperature for extended periods. Place it on a covered plate or in an airtight container and refrigerate for approximately four to five days. Keeping the dessert covered helps protect the pastry from absorbing refrigerator odors and prevents the exposed surface from drying out. For the best texture, allow individual slices to lose some of their refrigerator chill before serving.
Can I Freeze Torta della Nonna?
Freezing is not recommended for this particular recipe because the pastry cream may separate or lose its smooth, creamy consistency after thawing. The pastry can also become softer as moisture moves through the filling and crust. If you want to prepare the dessert in advance, refrigerating the separate components overnight is a better option. Assemble and bake the tart closer to serving time when possible, then cool it properly before storing it in the refrigerator.
Torta della Nonna Recipe
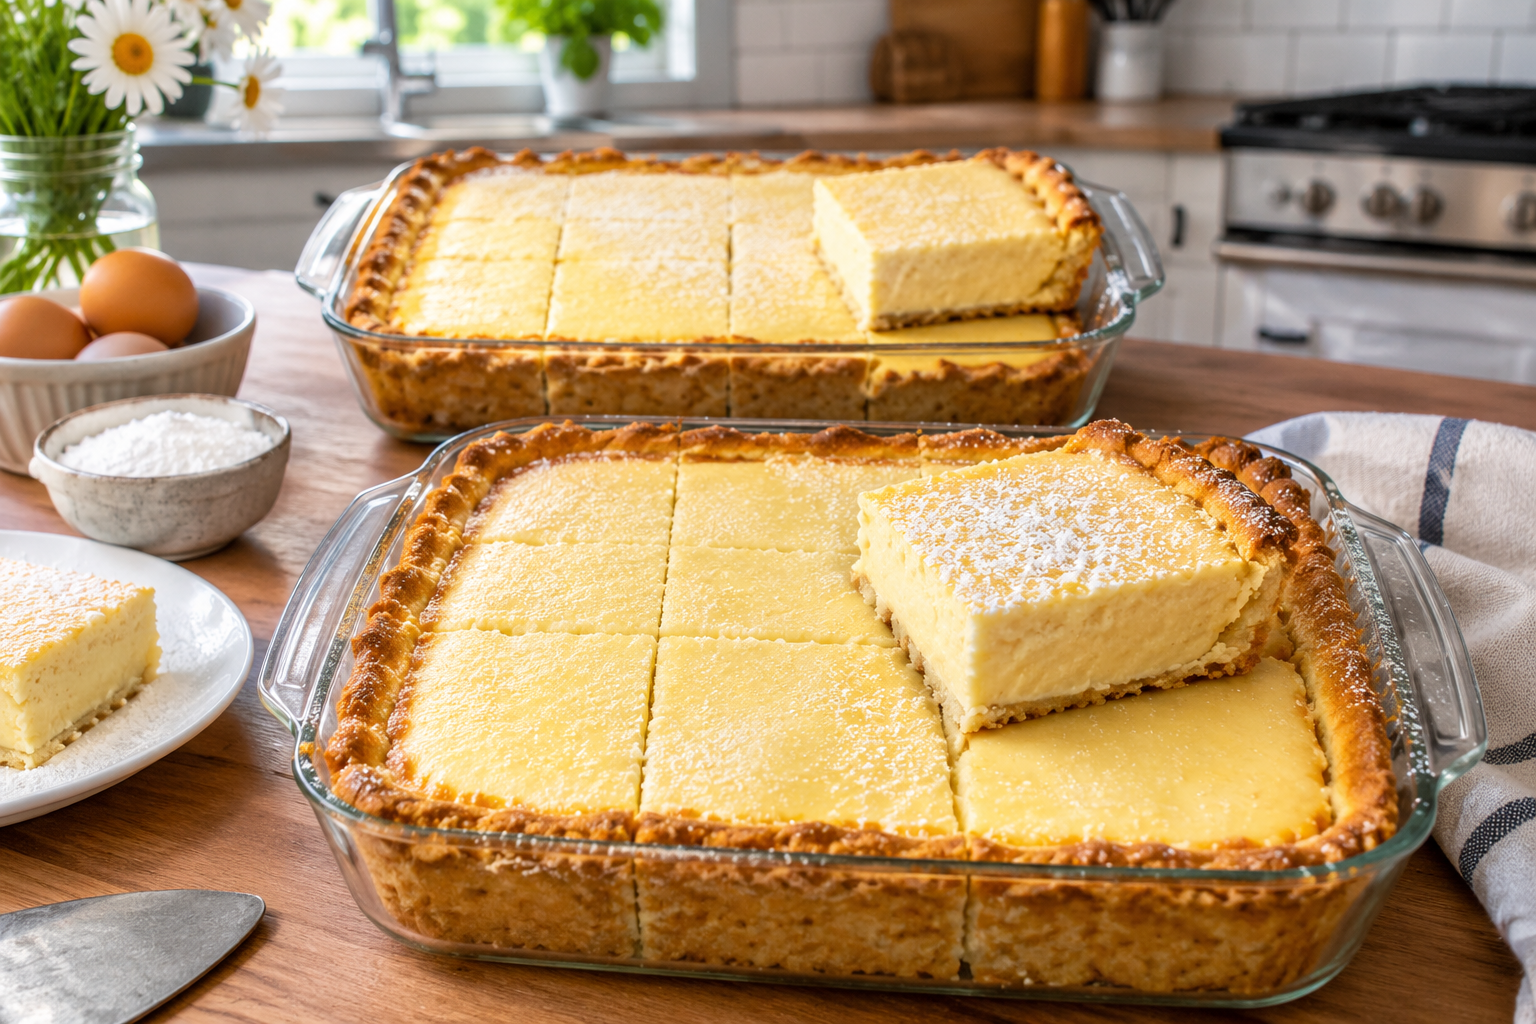
A traditional Italian custard tart featuring a buttery lemon-scented crust, smooth vanilla pastry cream, and a classic pine nut topping, finished with a light dusting of powdered sugar.
12
servings30
minutes40
minutes323
kcal60
minutes2
hours10
minutesIngredients
- For the Pastry Cream Filling
2½ cups (590 ml) whole milk
2 teaspoons vanilla extract
4 egg yolks
¾ cup (150 grams) granulated white sugar
¼ cup (30 grams) all-purpose (plain) flour
- For the Crust
2½ cups (300 grams) all-purpose flour, plus extra for rolling
1 teaspoon lemon zest
¾ teaspoon baking powder
A pinch of salt
6 ounces (1½ sticks / 170 grams) cold unsalted butter, cut into small chunks
⅔ cup (130 grams) granulated white sugar
1 egg
1 egg yolk
1 tablespoon pine nuts
Directions
- Warm the Milk
Heat the milk and vanilla extract in a medium saucepan until the milk just comes to a boil. Remove the saucepan from the heat and allow the milk to cool slightly. - Mix the Egg Yolks and Sugar
In a medium bowl, whisk the egg yolks and granulated sugar until the mixture becomes light and creamy. Stir in the flour until evenly combined. - Combine the Milk and Egg Mixture
Gradually pour the warm milk into the egg mixture while whisking continuously. Mix thoroughly to prevent lumps and help the ingredients combine smoothly. - Cook the Pastry Cream
Strain the mixture back into the saucepan. Return it to medium heat and stir continuously until the custard thickens. Allow it to bubble gently for one full minute to cook the flour. - Cool the Filling
Transfer the pastry cream to a clean bowl and cover its surface directly with plastic wrap. Leave it to cool completely before assembling the tart. - Prepare the Pastry Dough
Place the flour, lemon zest, baking powder, salt, and cold butter in a food processor. Pulse until the mixture resembles breadcrumbs. Add the sugar, egg, and egg yolk, then process briefly until the dough begins to come together. - Chill the Dough
Transfer the dough to a work surface and bring it together gently. Flatten it into a thick round, wrap it in plastic wrap, and refrigerate for one hour. - Prepare the Tart Pan
Preheat the oven to 350°F (180°C). Grease a 10-inch (25 cm) tart pan with a removable base. Roll out half the dough on a lightly floured surface and use it to line the base and sides of the pan. - Add the Custard
Spoon the completely cooled pastry cream into the pastry shell. Spread it evenly, making sure the filling reaches the edges without spilling over. - Cover and Decorate
Roll out the remaining dough and place it over the filling. Press the edges together gently to seal the tart. Sprinkle the pine nuts evenly over the top. - Bake the Tart
Bake for approximately 40 minutes, or until the pastry is cooked through and lightly golden. If the top becomes too dark, cover it loosely with aluminum foil and continue baking until done. - Cool and Serve
Allow the tart to cool completely before removing it from the pan. Dust the top with powdered sugar, slice into 12 portions, and serve.
Notes
- Smooth custard: Add warm milk gradually to the egg yolks while whisking to help prevent curdling.
- Proper thickening: Let the pastry cream bubble for a full minute after thickening to cook the flour.
- Tender pastry: Handle the dough gently and avoid overworking it.
- Easy rolling: Keep the dough chilled and dust the work surface with flour if it becomes sticky.
- Golden pine nuts: Soak the pine nuts in water for approximately five minutes before baking to help reduce burning.
- Make-ahead preparation: Prepare the pastry and custard one day in advance and refrigerate them separately. Let the dough sit out for about 15 minutes if it is too firm to roll.
- No food processor: Rub the cold butter into the dry ingredients by hand until crumbly, then add the sugar and eggs and mix gently to form a dough.
- Blind baking: The crust does not need to be blind-baked when the custard is properly thickened and cooled.
- Storage: Refrigerate the baked tart, covered, for four to five days.
- Freezing: Not recommended because freezing and thawing may cause the pastry cream to separate and lose its smooth texture.
Nutrition Facts
- Serving Size: 12 g
- Calories: 323kcal
- Fat: 15g
- Saturated Fat: 8g
- Carbohydrates: 42g
- Sugar: 24g
- Protein: 6g
