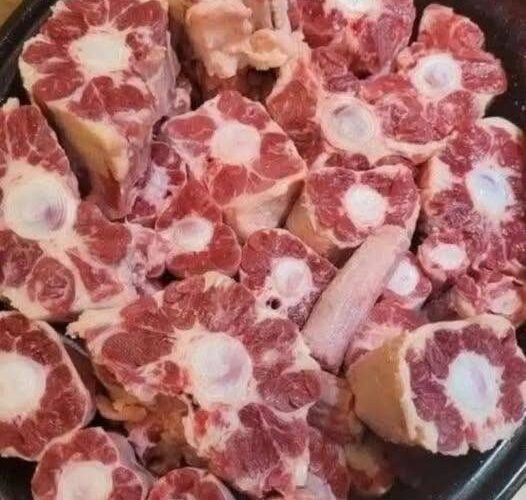
There’s nothing quite like the aroma of a hearty roast slowly cooking throughout the day. This Rustic Garlic Herb Slow-Cooked Meat Roast is a comforting, home-style meal that transforms a simple cut of beef into a tender, flavorful centerpiece. Slow cooking allows the meat to become incredibly juicy while absorbing the rich flavors of fresh garlic, fragrant herbs, and savory broth. As the roast cooks, the vegetables soak up the delicious juices, creating a complete meal that requires very little hands-on effort.
This recipe is perfect for cozy family dinners, Sunday suppers, holiday gatherings, or meal prepping for the week ahead. The combination of rosemary, thyme, parsley, and garlic creates a classic seasoning that enhances the natural flavor of the beef without overpowering it. A quick sear before slow cooking develops a rich caramelized crust, adding extra depth to every bite. The flavorful cooking liquid can also be turned into a smooth homemade gravy that pairs beautifully with the meat and vegetables.
Whether you’re an experienced cook or trying your first slow-cooked roast, this foolproof recipe delivers consistently delicious results. Serve it alongside mashed potatoes, buttered vegetables, or fresh bread for a comforting meal everyone will enjoy.
Why You’ll Love This Recipe
- Tender, juicy, fall-apart beef
- Rich garlic and fresh herb flavor
- Easy preparation with simple pantry ingredients
- Perfect for slow cookers or crockpots
- Naturally creates a flavorful cooking broth
- Excellent for family dinners and holidays
- Leftovers taste even better the next day
- Great for meal preparation and freezing
- Minimal hands-on cooking time
- Beginner-friendly recipe with reliable results
Preparation Time
- Preparation Time: 20 minutes
- Seasoning Time: 10 minutes
- Searing Time: 10 minutes
- Slow Cooking Time: 7–8 hours on Low or 4–5 hours on High
- Resting Time: 15 minutes
- Total Time: About 8 hours
- Servings: 6–8
Ingredients
For the Roast
- 3–4 pounds beef chuck roast, rump roast, or shoulder roast
- 2 tablespoons olive oil
- 2 teaspoons salt
- 1 teaspoon black pepper
- 1 teaspoon smoked paprika
- 1 teaspoon onion powder
Garlic Herb Mixture
- 8 cloves garlic, finely minced
- 2 tablespoons fresh rosemary, chopped
- 2 tablespoons fresh thyme leaves
- 1 tablespoon fresh parsley, chopped
- 1 tablespoon Dijon mustard
- 2 tablespoons olive oil
Vegetables
- 4 large carrots, peeled and cut into large chunks
- 4 medium potatoes, cut into large pieces
- 2 onions, sliced into thick wedges
- 2 celery stalks, chopped into large pieces
Cooking Liquid
- 2 cups beef broth
- 1 tablespoon Worcestershire sauce
- 1 tablespoon tomato paste
Optional Gravy
- 2 tablespoons cornstarch
- 3 tablespoons cold water
Equipment Needed
- Slow cooker or crockpot
- Large skillet
- Cutting board
- Sharp knife
- Small mixing bowl
- Measuring cups and spoons
- Tongs
- Whisk
- Saucepan (optional for gravy)
Instructions
Step 1: Prepare the Beef
Remove the roast from the refrigerator about 30 minutes before cooking. Allowing the meat to come closer to room temperature promotes more even cooking.
Pat the roast completely dry using paper towels. Removing excess moisture helps create a beautifully browned crust during searing.
In a small bowl, combine the salt, black pepper, smoked paprika, and onion powder. Sprinkle the seasoning evenly over every side of the roast, gently pressing it into the meat so it adheres well.
Step 2: Make the Garlic Herb Paste
In another small bowl, combine:
- Minced garlic
- Chopped rosemary
- Fresh thyme
- Chopped parsley
- Dijon mustard
- Olive oil
Mix thoroughly until a thick, fragrant paste forms.
Spread the herb mixture generously over the entire roast, coating every surface. Press it gently into the meat so the herbs remain in place while cooking.
This flavorful paste slowly infuses the roast with savory herb flavor during the long cooking process.
Step 3: Sear the Roast
Heat the olive oil in a large skillet over medium-high heat.
Once the oil is hot, carefully place the roast into the skillet.
Sear each side for approximately 2 to 3 minutes until a deep golden-brown crust develops.
Turn the roast using tongs to brown every side, including the edges whenever possible.
Although optional, this step adds significant flavor by creating caramelized browned surfaces that enrich the finished roast.
Transfer the browned roast to a plate while preparing the vegetables.
Step 4: Prepare the Vegetables
Arrange the carrots, potatoes, onions, and celery evenly across the bottom of the slow cooker.
These vegetables serve two important purposes. They lift the roast slightly above the bottom of the cooker, allowing heat to circulate evenly, and they absorb the flavorful cooking juices as the roast cooks.
Leave enough space in the center for the meat to rest comfortably.
Step 5: Position the Roast
Place the seared roast directly on top of the vegetables.
Try to center the roast so it cooks evenly.
The vegetables help support the meat while allowing the broth to circulate around it, creating moist cooking conditions throughout the day.
Step 6: Prepare the Cooking Liquid
In a measuring cup or bowl, whisk together:
- Beef broth
- Worcestershire sauce
- Tomato paste
Whisk until the tomato paste completely dissolves.
Carefully pour the mixture around the sides of the roast instead of directly over the top. This helps preserve the garlic herb coating while still keeping the meat moist.
The cooking liquid will slowly blend with the natural juices released from the beef to create a rich and flavorful broth.
Step 7: Slow Cook
Cover the slow cooker securely with its lid.
Cook using one of the following settings:
- Low: 7–8 hours (recommended)
- High: 4–5 hours
Cooking on the Low setting produces the most tender and flavorful results because the connective tissue has more time to break down.
Avoid lifting the lid frequently, as every peek releases heat and increases the cooking time.
Step 8: Check for Doneness
After the recommended cooking time, test the roast with a fork.
The fork should slide easily into the thickest part of the meat, and the roast should pull apart effortlessly.
If the meat still feels firm, continue cooking for another 30 to 60 minutes before testing again.
Cooking times may vary slightly depending on the size and thickness of the roast.
Step 9: Rest the Meat
Carefully lift the roast from the slow cooker and place it on a serving platter.
Loosely cover it with aluminum foil.
Allow the roast to rest for 10 to 15 minutes before slicing or shredding.
Resting allows the juices to redistribute throughout the meat, keeping every bite moist and flavorful.
Step 10: Prepare the Optional Gravy
Pour the cooking liquid through a fine strainer into a saucepan.
Bring it to a gentle simmer over medium heat.
In a small bowl, stir together the cornstarch and cold water until completely smooth.
Slowly whisk the slurry into the simmering broth.
Continue stirring for 2 to 3 minutes until the gravy thickens to your desired consistency.
Taste and adjust the seasoning with additional salt or pepper if needed.
Serve the warm gravy over sliced roast and vegetables.
Serving Suggestions
This comforting roast pairs well with many classic side dishes, including:
- Creamy mashed potatoes
- Buttered green beans
- Roasted Brussels sprouts
- Steamed rice
- Buttered egg noodles
- Fresh dinner rolls
- Roasted sweet potatoes
- Garden salad
- Homemade biscuits
- Crusty artisan bread
A generous spoonful of homemade gravy brings all the flavors together for a satisfying meal.
Storage Instructions
Allow the roast to cool completely before storing.
Place leftover meat and vegetables in an airtight container with a small amount of the cooking liquid to help retain moisture.
Store in the refrigerator for up to 4 days.
Reheat gently on the stovetop, in the microwave, or in a covered baking dish in the oven until heated through.
Freezing Instructions
This roast freezes very well.
After cooling completely, divide the meat into individual portions.
Place each portion into freezer-safe containers or heavy-duty freezer bags along with some cooking broth or gravy.
Freeze for up to 3 months.
Defrost overnight in the refrigerator before reheating.
Tips for Perfect Results
- Choose a well-marbled chuck roast for the most tender texture.
- Always pat the meat dry before seasoning.
- Sear the roast before slow cooking for deeper flavor.
- Fresh herbs provide the best aroma and taste.
- Cook on the Low setting whenever possible.
- Avoid removing the slow cooker lid during cooking.
- Cut vegetables into large pieces so they hold their shape.
- Let the roast rest before slicing.
- Save every drop of the cooking liquid for homemade gravy.
- Slice against the grain for the most tender bites.
Delicious Variations
1. Red Wine Herb Roast
Replace one cup of the beef broth with dry red wine for a deeper, richer flavor.
2. Extra Garlic Roast
Double the amount of garlic in the herb paste for a bold garlic flavor.
3. Mushroom Herb Roast
Add 8 ounces of sliced mushrooms during the final 2 hours of cooking.
4. Spicy Garlic Roast
Mix ½ teaspoon cayenne pepper or red pepper flakes into the seasoning blend for gentle heat.
5. Italian Herb Roast
Add oregano and basil to the herb mixture for an Italian-inspired variation.
