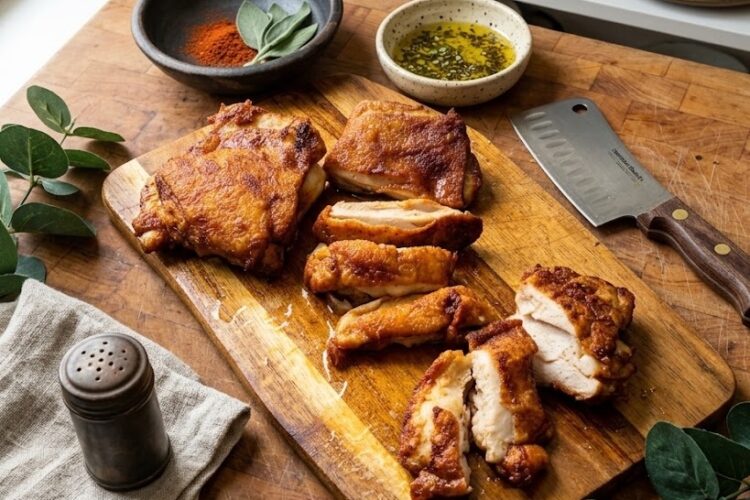
Air Fryer Crunch Chicken is an easy way to make incredibly crispy chicken with a juicy, tender center in a short amount of time. Using bone-in chicken thighs with the skin attached gives this recipe its rich flavor and naturally crisp exterior, while a simple starch and seasoning coating creates an extra crunchy finish. This quick air fryer chicken recipe is ideal for busy weeknight dinners when you want something satisfying without spending a long time in the kitchen.
Why Air Fryer Crunch Chicken Is So Crispy
The secret behind the crunchy coating
The air fryer is excellent at creating crisp chicken because hot air circulates rapidly around the food, helping the outside brown while the inside cooks. Chicken skin can become pleasantly crisp on its own, but adding a light coating of starch takes the texture to another level. Cornstarch, tapioca starch, arrowroot starch, or potato starch can all provide the dry coating needed to produce a crunchy surface without requiring a traditional deep-frying method.
The combination of starch and spices creates a thin crust that clings to the chicken as it cooks. Rather than using a heavy batter, this recipe relies on a simple seasoned coating, which keeps the preparation quick and uncomplicated. The result is air fryer chicken that has a noticeably crisp exterior while remaining moist inside. This makes it a useful recipe for anyone looking for crispy chicken without the mess of a pan filled with hot oil.
Choosing the Right Chicken Thighs
Why skin-on chicken matters
Chicken thighs are particularly suitable for this recipe because they contain more natural moisture and fat than many leaner cuts of chicken. The skin is especially important because it becomes beautifully crisp in the air fryer and helps provide much of the flavor and texture associated with crunchy chicken. For this reason, the recipe begins with bone-in chicken thighs with the skin still attached.
Although the chicken starts as bone-in, the bone is removed before cooking. This may seem unusual at first, but there is a practical reason for doing it this way. Finding boneless chicken thighs with the skin completely intact can be difficult, while bone-in, skin-on thighs are much easier to find. Removing the bone yourself gives you the best of both options: intact chicken skin and a convenient boneless piece for quick cooking.
How to Remove the Chicken Bone
Using poultry shears safely
Removing the bone from chicken thighs is easier than it may appear, especially when you have a sturdy pair of poultry shears. Place the chicken on a clean cutting board with the bone accessible, then carefully cut around the bone while separating the meat from it. The goal is to remove the bone without tearing away the skin or breaking the chicken into several pieces.
Take your time while cutting, particularly if you are unfamiliar with poultry shears. Keeping the chicken in one piece makes it easier to coat and cook evenly. Once the bone has been removed, inspect the chicken for any small pieces of bone or cartilage and remove them before continuing. This simple preparation step makes the chicken much easier to handle in the air fryer.
Why Even Thickness Makes Better Chicken
The importance of pounding the thighs
After removing the bone, the chicken thigh may have areas that are considerably thicker than others. Giving the meat a quick, gentle pound helps create a more even thickness across the piece. This small step can make a meaningful difference because thinner portions cook more quickly than thick portions.
When chicken has uneven thickness, the thinner sections can become overcooked while you wait for the thickest section to finish. Overcooking removes moisture and can leave chicken dry or chewy. Flattening the thigh slightly helps the entire piece cook at a more consistent rate. It also allows the air fryer to work more efficiently, which is particularly useful when preparing a quick dinner.
The Seasoning Combination
Paprika, garlic, onion, and oregano
The seasoning mixture in this crispy air fryer chicken recipe is straightforward but flavorful. Paprika provides a warm color and savory depth, while garlic powder and onion powder build the main aromatic flavor. Oregano adds an earthy herbal note that balances the stronger spices, and salt brings the entire mixture together.
Because the chicken itself has plenty of flavor from the skin and thighs, there is no need for a complicated marinade. The dry seasoning mixture can be prepared in just a few moments, making this recipe especially convenient when you want dinner on the table quickly. The spices also become toasted during air frying, contributing to the appealing aroma and golden appearance of the finished chicken.
How the Starch Creates a Crunchy Crust
A simple alternative to traditional breading
One of the most useful parts of this recipe is the starch coating. Instead of preparing flour, eggs, and breadcrumbs, you simply combine the starch with the spices and coat the chicken. This creates a much simpler preparation process while still giving the chicken a crisp outer layer.
Starch works well in high-heat cooking because it helps create a dry, crunchy surface. The coating remains relatively light, so the finished chicken does not feel weighed down by a thick breading. This is one reason Air Fryer Crunch Chicken can be prepared quickly while still delivering the satisfying texture people expect from crispy chicken.
Preparing the Chicken for the Air Fryer
Coat every part evenly
Once the chicken has been prepared, combine the starch and seasonings thoroughly in a suitable bowl. Toss each chicken thigh through the mixture, making sure both sides receive an even coating. A consistent coating helps ensure that the chicken develops a balanced crust rather than having some areas heavily covered while other areas remain mostly bare.
After coating, drizzle the chicken with mild oil. Only a mild-flavored oil is needed because the seasoning mixture should remain the main source of flavor. The oil also helps encourage browning and crisping during air frying. Avoid using an excessive amount, as the goal is to achieve a crunchy coating rather than make the chicken greasy.
Air Frying the Chicken
Cooking at 400 degrees
The chicken is cooked in the air fryer at 400 degrees for approximately 10 to 12 minutes, depending on the thickness of the pieces. The exact cooking time can vary because chicken thighs are not always identical in size. Thicker pieces may require more time, while thinner pieces can cook more quickly.
Arrange the chicken so that the pieces have enough room for hot air to circulate around them. Crowding the basket can interfere with browning and crisping because the hot air cannot move freely around each piece. Keeping the chicken in a single, uncrowded layer is a simple way to encourage a crispier result.
How to Keep Air Fryer Chicken Juicy
Avoid overcooking
Crispy chicken is only enjoyable when the inside remains tender and juicy. The key is to avoid leaving the chicken in the air fryer longer than necessary. Flattening the chicken to an even thickness helps reduce the risk of overcooking because the meat can finish at a more consistent rate.
Cooking time should always be considered together with the size and thickness of the chicken. Rather than relying only on the clock, check the chicken for doneness. Properly cooked chicken should no longer be raw in the center. If you regularly make air fryer chicken, learning how your particular air fryer cooks can also help you determine the best timing for future batches.
Why This Recipe Works for Busy Weeknights
Quick preparation with minimal cleanup
Air Fryer Crunch Chicken requires very little preparation. The bone is removed, the chicken is lightly flattened, the starch and seasonings are mixed, and the chicken is coated before going directly into the air fryer. There is no lengthy marinating period or complicated breading station, which makes this recipe particularly practical for busy evenings.
The air fryer also reduces the need for a large amount of cooking oil. Compared with traditional fried chicken methods, there is no need to heat a deep pan of oil or deal with splattering grease. Once the chicken is cooking, the air fryer handles most of the work, leaving you free to prepare a side dish or finish the rest of dinner.
Serving Air Fryer Crunch Chicken
Ideas for turning it into a complete meal
This crispy chicken can be served in many different ways. It works well as the main protein alongside vegetables, salad, potatoes, or another favorite side dish. Because the chicken has a flavorful seasoned crust, it can also be sliced and added to bowls, wraps, sandwiches, or salads.
The recipe is also flexible enough to pair with different sauces. A spicy honey drizzle can add sweetness and heat, while a creamy dipping sauce can provide a cooler contrast to the crisp coating. You can keep the chicken simple when serving it as a weeknight main dish or use it as a versatile protein for other meals.
Making the Most of the Chicken Skin
Crisp skin is part of the appeal
Chicken skin plays an important role in this recipe. It contributes flavor, moisture, and the crisp texture that makes the dish distinctive. Keeping the skin attached while removing the bone gives the chicken a surface that responds especially well to the high heat of an air fryer.
For the best texture, avoid covering the skin with an unnecessarily thick layer of coating. The goal is to combine the natural crispness of the chicken skin with the crunchy texture created by the seasoned starch. When these two elements cook together, the result is a particularly satisfying bite with a crisp outside and tender meat underneath.
Choosing a Starch
Several options can work
The recipe allows flexibility when choosing the starch. Cornstarch, tapioca starch, arrowroot starch, or potato starch can be used. The ingredient quantity remains the same regardless of which starch you choose. This makes the recipe convenient if you already have one of these starches in your pantry.
The starch should be mixed thoroughly with the paprika, garlic powder, onion powder, oregano, and salt before the chicken is coated. Combining everything first ensures that the seasoning is distributed throughout the coating instead of concentrating in certain areas. This simple preparation step helps every bite have a consistent savory flavor.
Getting Better Results From Your Air Fryer
Give the chicken enough space
Air circulation is one of the main reasons air fryers are able to create crispy food. For that reason, avoid stacking or tightly overlapping the chicken pieces. If your air fryer basket is small, cooking in batches may provide better results than trying to fit everything in at once.
It is also useful to remember that different air fryer models can cook at slightly different rates. The stated 10 to 12 minute cooking time is a guide based on the thickness of the chicken. Checking the chicken as it approaches the end of the cooking period helps prevent accidental overcooking while still allowing the coating to become crisp.
Notes for the Best Crunch
Small details that make a difference
For the crispiest Air Fryer Crunch Chicken, start with chicken thighs that have the skin intact and remove the bone carefully. Flattening the meat to an even thickness helps it cook more consistently. Make sure the starch and spices are well combined before coating, and distribute the coating evenly over both sides of the chicken.
A light drizzle of mild oil is enough to support browning without overwhelming the chicken. Avoid overcrowding the air fryer basket and pay attention to the thickness of each piece when deciding whether the chicken needs the full cooking time. These straightforward details help produce chicken that is crunchy on the outside and tender inside.
Notes on Serving and Storage
Enjoying the chicken fresh
This chicken is at its best when served soon after air frying because the coating is especially crisp while hot. If you are serving it with a sauce, consider drizzling the sauce shortly before eating so the crunchy exterior does not become unnecessarily soft.
If you have leftovers, store them appropriately and reheat them in an air fryer when possible. Reheating in the air fryer can help restore some of the crisp texture that may be lost during refrigeration. Avoid reheating for longer than necessary because excessive heat can dry out the chicken.
Frequently Considered Questions
Can I use a different starch?
Yes. The recipe specifically allows several starch options, including cornstarch, tapioca starch, arrowroot starch, and potato starch. Use the same stated quantity and choose whichever option you already have available. The purpose of the starch is to provide the light coating responsible for the crunchy exterior.
Why remove the bone if the recipe starts with bone-in thighs?
The bone is removed because bone-in chicken thighs are more commonly sold with the skin intact. The recipe needs that skin for its crisp texture, while removing the bone makes the chicken easier and faster to cook. Using poultry shears makes the process relatively quick once you become comfortable with the technique.
Why should I pound the chicken?
Pounding the chicken helps create a more even thickness. This allows the meat to cook more consistently and reduces the chance of thinner sections becoming dry while thicker sections are still cooking. It also helps make the overall cooking process faster.
Can I make this without an air fryer?
This recipe is specifically designed around air frying, which provides the rapid hot-air circulation needed for the crisp exterior. Other cooking methods can produce chicken, but the cooking temperature and timing would need to be adjusted rather than simply copied from the air fryer instructions.
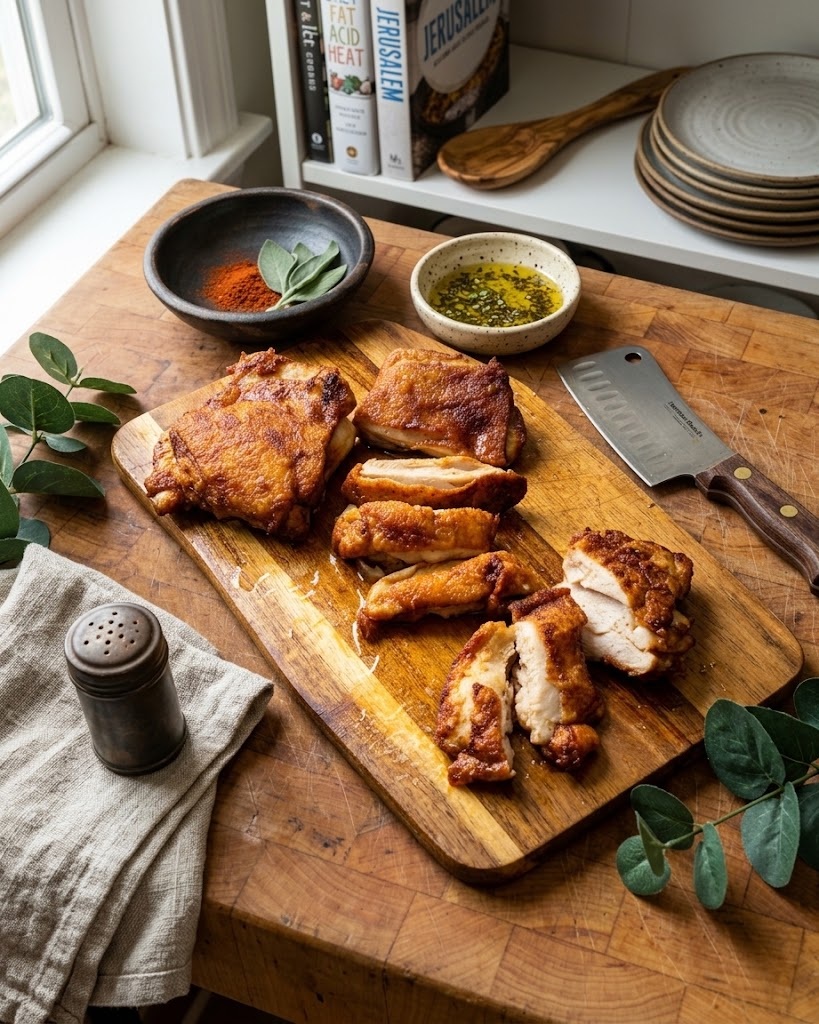
Air Fryer Crunch Chicken
Crispy Air Fryer Crunch Chicken made with skin-on chicken thighs, a seasoned starch coating, and mild oil.
4
servings10
minutes12
minutes22
minutesIngredients
1 lb bone-in chicken thighs, with skin
3 tbsp starch, any type
2 tbsp paprika
2 tsp garlic powder
2 tsp onion powder
1 tsp oregano
2 tsp salt
Mild oil of choice
Directions
- Using poultry shears, carefully cut around and remove the bones from the chicken thighs while keeping the skin attached and the meat in one piece.
- Place the prepared chicken thighs on a cutting board and gently pound them until they have a more even thickness. This helps the chicken cook consistently.
- Combine the starch, paprika, garlic powder, onion powder, oregano, and salt in a bowl. Mix thoroughly so the spices are evenly distributed throughout the starch.
- Place the chicken thighs into the seasoning mixture and toss until both sides are evenly covered with the starch and spice coating.
- Drizzle the coated chicken lightly with mild-flavored oil of your choice.
- Place the chicken in the air fryer and cook at 400°F for 10–12 minutes, adjusting the cooking time according to the thickness of the chicken pieces.
- Make sure the chicken is fully cooked before serving. Thicker pieces may require slightly more cooking time than thinner pieces.
