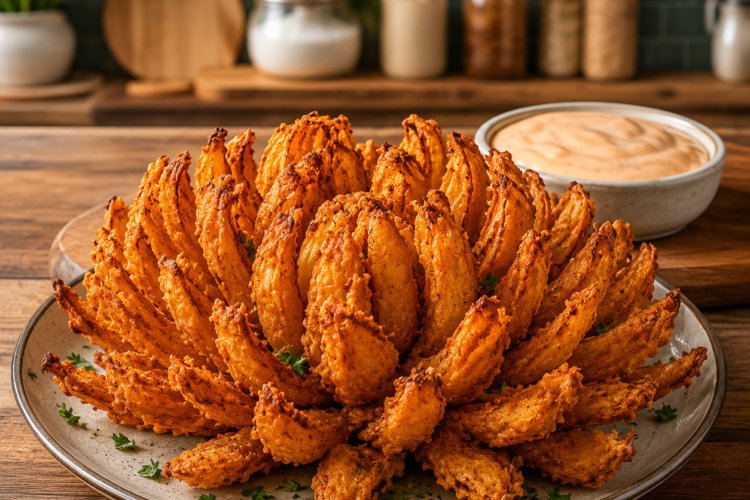
An Air Fryer Blooming Onion is a delicious restaurant-style appetizer with crispy seasoned onion petals arranged in a beautiful flower-like shape. This popular appetizer may look difficult to prepare, but the process becomes much easier once you understand how to cut the onion correctly. The air fryer creates a golden, crisp coating while the onion inside becomes tender and flavorful. This homemade blooming onion is ideal for game day, family dinners, parties, movie nights, or any occasion when you want to serve a fun and impressive appetizer.
Unlike a traditional deep-fried blooming onion, this air fryer version uses significantly less oil. The onion is coated in seasoned flour, dipped into a mixture of eggs, milk, and water, then coated with flour once again before cooking. A light coating of oil helps the breading become crisp and golden in the hot air fryer. The finished appetizer still offers the satisfying combination of crunchy coating and soft, sweet onion that makes blooming onions so popular at restaurants.
This Air Fryer Appetizer
A blooming onion is often considered a special restaurant appetizer because of its size, appearance, and crispy texture. Making one at home allows you to enjoy the same style of food without needing to visit a restaurant or use a large amount of frying oil. The air fryer is especially useful because it provides intense circulating heat that can crisp the seasoned coating while keeping the preparation process easier and less messy than deep frying.
This recipe is also perfect for sharing. The onion opens into separate petals that can be pulled apart and dipped into your favorite sauce. A creamy blooming onion dip is a classic choice, but the finished onion also tastes great with ketchup, mustard, cheese sauce, or fry sauce. The combination of a warm crispy onion and a cool dipping sauce creates a satisfying contrast that makes this appetizer especially enjoyable.
Although the blooming onion looks impressive when served, the preparation is based on a few simple techniques. The most important step is slicing the onion while keeping the root area attached. After that, the recipe follows a basic breading process. You coat the onion with seasoned flour, dip it into the egg mixture, coat it again with flour, spray it with oil, and cook it until crisp. With patience and careful cutting, even a home cook can make this eye-catching appetizer.
Choosing the Best Onion for a Blooming Onion
A large sweet onion is the best choice for this Air Fryer Blooming Onion recipe. Sweet onions have a milder flavor and become tender when cooked, making them enjoyable even when served as the main ingredient in a large appetizer. Their naturally sweeter taste also works very well with the savory and slightly spicy coating made with paprika, cayenne pepper, cumin, thyme, oregano, salt, and pepper.
The onion should be large, firm, and free from soft or damaged areas. A large onion gives you enough room to create the many petals needed for the blooming shape. Yellow or white onions can also be used, but they may have a stronger flavor. Regardless of which variety you select, the root end must remain firm and intact because it holds the entire onion together after it has been sliced.
A sweet onion is also a practical choice when cutting the blooming shape because some sweet varieties contain fewer of the compounds that can make your eyes water. Since this recipe requires several careful cuts, a milder onion can make the preparation process more comfortable. Choose an onion with a healthy root section, as this small area is what keeps the finished bloom connected throughout breading and cooking.
How to Cut an Onion Into a Blooming Shape
Keep the Root End Attached
The cutting technique is the key to a successful homemade blooming onion. Begin by cutting approximately one-half inch from the top of the onion. Remove the outer papery skin while leaving the root end untouched. The root is the part that will hold all the individual petals together, so it is essential not to cut completely through it during the slicing process.
Place the onion on a cutting board with the cut side facing downward and the root facing upward. Using a sharp knife, make a downward cut beginning about one-half inch away from the root and continue all the way to the cutting board. Repeat this process around the onion until you have created four evenly spaced main sections. Work slowly and keep the root intact with every cut.
Next, make three additional cuts between each of the four main sections. This should give you approximately 16 evenly spaced cuts around the onion. The sections do not have to be perfectly identical, but keeping them reasonably even helps the onion open properly and cook more consistently. A sharp knife is helpful because it makes clean cuts without crushing the onion or tearing the delicate layers.
After cutting, turn the onion over and let it sit for about five minutes. During this resting period, the layers will begin to relax and naturally separate. Use your fingers to gently open the petals and create the blooming shape. Do not force the layers too aggressively, as this can break the onion apart. A little patience at this stage helps create the attractive flower-like appearance that makes this appetizer special.
Preparing the Seasoned Flour Coating
The seasoned coating gives the blooming onion its crispy texture and bold flavor. All-purpose flour forms the main part of the breading. Paprika adds warm color and savory flavor, while cayenne pepper brings a noticeable level of heat. Ground cumin contributes an earthy flavor, and the dried thyme and oregano add a balanced herbal taste to the mixture.
Whisk the flour and seasonings together thoroughly in a large bowl. Add salt and pepper to taste and continue mixing until the spices are evenly distributed throughout the flour. Because a blooming onion has many layers and spaces between its petals, the recipe uses enough flour to make sure every section can be coated. Some flour will remain after breading, which is completely normal.
The goal is to cover the onion thoroughly without creating a heavy layer of loose flour. Work the seasoned flour between the petals so that every part of the onion receives some of the flavorful coating. A spoon can help direct the flour into the small spaces, and your fingers can be used carefully when necessary. This step may be messy, but taking the time to coat the onion properly helps create a better finished texture.
The Double-Breading Process
First Coating and Egg Mixture
Place the prepared blooming onion into a clean bowl with the cut side facing upward. Pour the seasoned flour mixture over the onion and carefully work the flour between the petals. Once the onion is covered, turn it over and gently tap away the extra flour. Reserve the remaining seasoned flour because you will need it for the second coating.
In a separate bowl, whisk together the eggs, milk, and water. The eggs should be fully broken up so that the liquid mixture is smooth and evenly combined. This mixture provides the moisture needed for the second flour coating to stick to the onion. It also helps the breading develop a rich golden appearance during air frying.
Carefully dip the floured onion into the egg, milk, and water mixture. Allow the liquid to reach between the petals as much as possible. Lift the onion out and let the excess liquid drip back into the bowl. Avoid shaking it too strongly, because the individual sections of the onion should remain connected and the first layer of breading should stay in place.
Second Flour Coating
Return the dipped onion to the reserved seasoned flour mixture for the second coating. Cover the entire onion once more, making sure flour reaches between the petals. This double-breading process creates the textured surface that helps the blooming onion become crisp. Once coated, gently tap away the excess flour and place the prepared onion on a plate.
There will be leftover flour after the breading process, and that is expected. The extra flour is needed to ensure that the onion can be thoroughly coated. You should not try to use every bit of it. A thick layer of loose flour can remain dry during cooking, so gently removing excess flour helps create a more even and appealing final texture.
Why Preheating the Air Fryer Matters
Place the breaded onion in the refrigerator while the air fryer preheats. Set the air fryer to 350ºF and allow it to heat for 10 minutes. Preheating is particularly helpful for this recipe because the blooming onion is large and has a substantial coating that benefits from immediate exposure to consistent heat.
Starting with a hot air fryer helps the breading begin cooking and setting quickly. This can improve browning and help the coating become crisp more evenly. Although some air fryer recipes can be prepared without preheating, it is worth taking the extra time for a blooming onion. The difference in texture and color can be noticeable.
While the air fryer is heating, make sure you have the oil spray and an aluminum foil sling ready. The foil sling will make it easier to lower the delicate blooming onion into the hot air fryer basket and remove it safely after cooking. Preparing these items before opening the air fryer keeps the process organized and prevents unnecessary handling of the breaded onion.
Notes on Using Oil Spray
Oil Helps Create a Golden, Crispy Coating
Even though this recipe is made in an air fryer, oil still plays an important role. The breading needs a light coating of oil to become crisp and golden. Without enough oil, some areas of flour may remain pale, dry, or powdery. A refillable spray bottle makes it easy to apply the oil evenly across the many petals.
Remove the onion from the refrigerator after the air fryer has finished preheating. Spray the entire surface generously with oil, paying attention to the areas between the petals. You do not need to soak the onion, but the visible flour should receive enough oil to encourage browning and crispness.
During cooking, check the blooming onion and spray it with oil two or three additional times. Look for dry patches or areas where white flour is still visible. Lightly spray these sections before continuing to cook. This simple step can make a significant difference in the final appearance and help produce the rich golden-brown color associated with a crispy blooming onion.
How to Air Fry the Blooming Onion
Use an Aluminum Foil Sling
Because the air fryer basket will be hot after preheating, transferring the large breaded onion can be difficult. An aluminum foil sling provides a practical solution. Place the onion carefully on a sheet of aluminum foil that can support its weight. Use the foil to lower the onion gently into the air fryer basket with the cut side facing upward.
Set the air fryer to 350ºF and cook the blooming onion for 25 minutes. During the cooking process, spray the onion with oil two or three times, especially when you see areas with visible dry flour. Open the air fryer carefully and avoid touching the hot basket directly.
Cooking times can vary slightly between air fryer models, so check the onion as it approaches the end of the recommended cooking time. The breading should be golden brown and crisp, while the onion petals should be tender. Some edges may become slightly darker than others, which adds to the crispy texture and appearance.
If the onion is not yet browned enough after 25 minutes, continue cooking for a few more minutes and check it regularly. The tips of the onion petals can darken quickly, so avoid leaving the onion unattended for too long near the end of cooking. When finished, use the aluminum foil sling to carefully lift the blooming onion from the basket.
How to Serve Air Fryer Blooming Onion
A freshly cooked blooming onion is best served while it is still hot and crispy. Transfer it to a large plate that gives the onion plenty of room to remain open. The flower-like shape makes a beautiful presentation, especially when the onion is placed in the center of the table for everyone to share.
A creamy blooming onion sauce is a classic choice and complements the savory, slightly spicy coating. However, this crispy onion appetizer is also delicious with ketchup, mustard, fry sauce, or cheese sauce. You can place the dipping sauce in a small bowl beside the onion or serve it separately depending on your preferred presentation.
This appetizer works particularly well as a game day snack because the petals can be easily pulled apart and shared. It is also suitable for family dinners, casual parties, weekend gatherings, and holiday entertaining. The impressive appearance makes it feel special, while the familiar flavors make it appealing to a wide range of guests.
Notes for the Best Crispy Blooming Onion
The root is the most important part of the onion during preparation. Always leave about one-half inch around the root area untouched. If you cut through the root, the petals will separate and the onion will not hold its blooming shape. Work slowly and check the location of each cut before slicing.
A sharp knife is another important tool for success. Clean cuts help the onion open properly, while a dull knife can crush the layers or create uneven sections. Once the onion has rested after cutting, gently encourage the petals to separate instead of pulling them apart quickly.
Make sure both the flour and liquid mixtures reach between the onion petals. The coating is responsible for much of the final flavor and texture, so taking time during the breading process is worthwhile. Finally, spray any dry flour with oil during cooking. These small details can help you achieve a more evenly browned, crispy, and flavorful Air Fryer Blooming Onion.
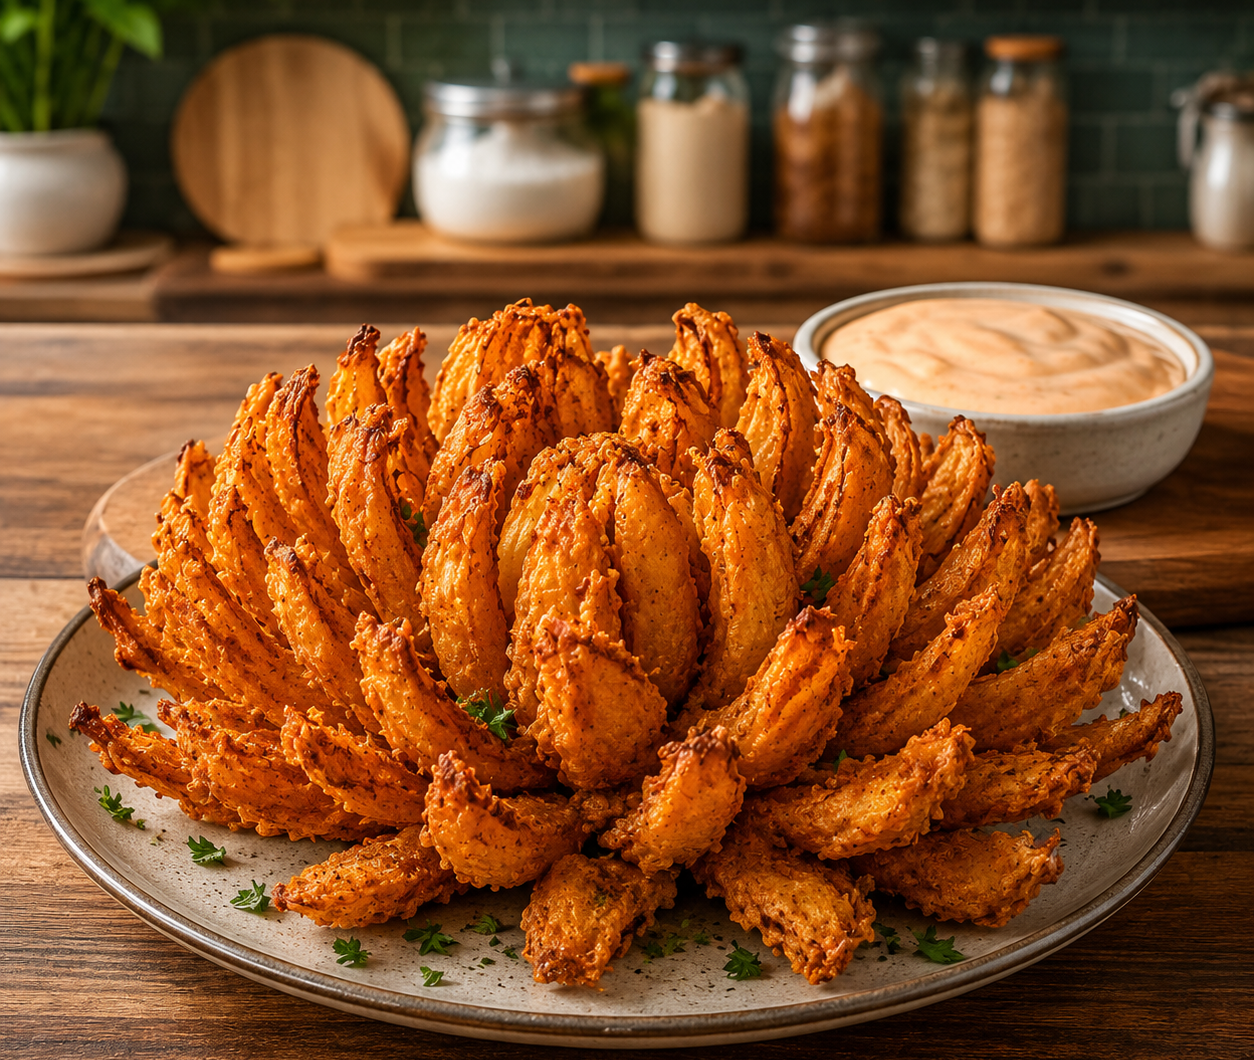
Air Fryer Blooming Onion
A crispy, golden Air Fryer Blooming Onion made with a large sweet onion, seasoned flour, eggs, milk, and aromatic spices. This restaurant-style appetizer is air fried until the onion petals are tender and the coating is crisp and flavorful.
6
servings10
minutes25
minutes278
kcal35
minutesIngredients
1 large sweet onion
2 ½ cups all-purpose flour
1 tablespoon paprika
1 teaspoon cayenne pepper
½ teaspoon ground cumin
½ teaspoon dried thyme
½ teaspoon dried oregano
2 large eggs
1 cup milk
1 cup water
Salt and pepper to taste
Oil in a spray bottle
Directions
- Cut ½ inch from the top of the onion, keeping the root intact. Remove the outer skin.
- Place the onion cut-side down. Beginning approximately ½ inch away from the root, make four evenly spaced downward cuts. Make three additional cuts between each section until you have 16 evenly spaced cuts.
- Turn the onion over and let it rest for 5 minutes. Gently separate the outer layers with your fingers to help the onion open into a blooming shape.
- Whisk together the all-purpose flour, paprika, cayenne pepper, ground cumin, dried thyme, dried oregano, salt, and pepper in a large bowl.
- In a separate deep bowl, whisk together the eggs, milk, and water until combined.
- Place the onion in a clean bowl with the cut side facing upward. Pour the seasoned flour over the onion and work the mixture between the petals. Turn the onion over and gently remove the excess flour. Reserve the remaining flour.
- Coat the floured onion evenly in the egg, milk, and water mixture. Remove it and allow the excess liquid to drip away.
- Return the onion to the reserved seasoned flour. Coat the petals thoroughly, then gently tap away any excess flour. Place the breaded onion in the refrigerator.
- Preheat the air fryer to 350ºF for 10 minutes.
- Remove the onion from the refrigerator and spray it generously with oil from the spray bottle.
- Make an aluminum foil sling and place it beneath the onion. Use the sling to carefully transfer the onion, cut side up, into the air fryer basket.
- Spray the onion with additional oil two or three times during cooking, especially on areas where dry flour remains visible.
- When the coating is golden brown and crisp, use the foil sling to carefully remove the onion. Season with salt and pepper and serve with your preferred blooming onion dip.
Nutrition Facts
- Calories: 278kcal
- Fat: 6g
- Carbohydrates: 47g
- Fiber: 3g
- Sugar: 3g
- Protein: 10g
