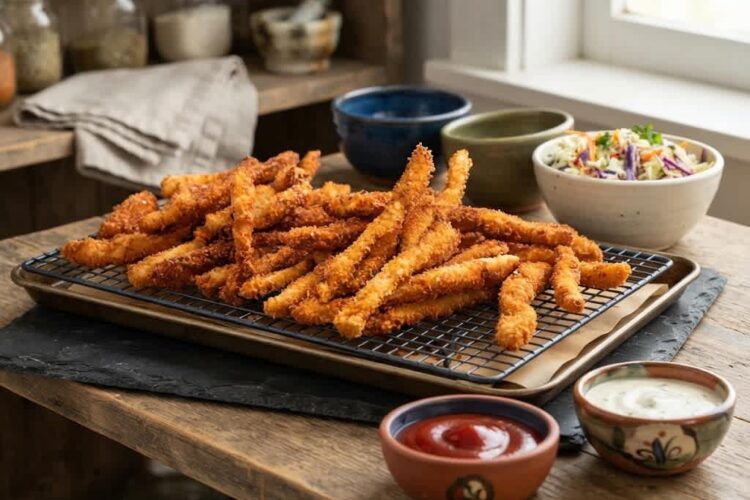
Crispy chicken fingers are one of those easy chicken dinner recipes that can make an ordinary meal feel special. These homemade chicken fries have a crunchy golden coating on the outside while staying tender and juicy inside.
The chicken is seasoned with sweet paprika, garlic powder, onion powder, sea salt, and black pepper, giving every bite plenty of flavor without making the seasoning too strong. Served with ketchup, ranch dipping sauce, or creamy coleslaw, these crispy chicken strips are a family-friendly meal that works for both weeknight dinners and casual gatherings.
Why These Homemade Chicken Fingers Are So Good
There is something particularly satisfying about homemade crispy chicken. Unlike many frozen or packaged chicken strips, these chicken fingers can be prepared with fresh chicken breast and a simple coating made from flour, eggs, and panko breadcrumbs. The panko creates a light, crunchy crust that becomes beautifully golden when shallow-fried. If you prefer to avoid frying, the same prepared chicken can be cooked in an air fryer for a convenient alternative with a crisp exterior and tender center.
Another advantage is the straightforward seasoning. You do not need a long list of spices to make flavorful chicken fingers. Sweet paprika adds gentle color and warmth, garlic and onion powder provide savory depth, while salt and freshly cracked black pepper bring everything together. The result is a balanced coating that works well for adults and children alike. Because the seasoning is simple, these chicken fries are also easy to pair with different sauces and side dishes.
The Best Chicken for Chicken Fries
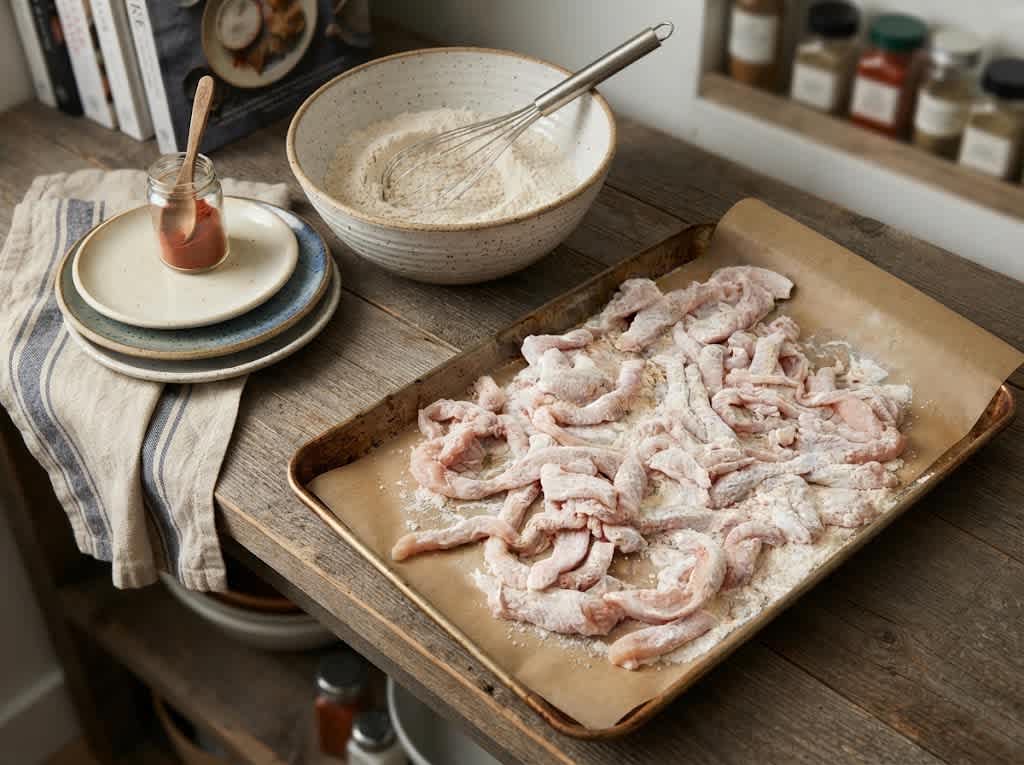
Boneless, skinless chicken breast works particularly well for this recipe because it is easy to cut into long, even strips. For the most consistent cooking, choose chicken breasts that are similar in thickness. Very thick breasts can be sliced horizontally into thinner pieces before cutting them into strips. This helps the chicken cook evenly and also produces pieces that are easier to coat with breadcrumbs.
When cutting the chicken, aim for strips approximately 1.5 cm, or about half an inch, wide. Keeping the pieces relatively similar in size is useful because they will require roughly the same amount of cooking time. Smaller, thinner pieces can cook quickly, while very thick strips may take longer to reach a safe internal temperature. Preparing the chicken carefully at the beginning makes the cooking stage much easier.
How to Make Crispy Chicken Fingers
The coating process uses three simple stages: seasoned flour, egg mixture, and panko breadcrumbs. Instead of placing each ingredient into multiple traditional bowls, you can arrange the flour and seasonings on a large sheet of parchment paper. This method gives you plenty of space to coat the chicken and can make the preparation less messy.
Start by combining the plain flour with sweet paprika, garlic powder, onion powder, sea salt flakes, and freshly cracked black pepper. Mix the seasonings thoroughly through the flour so that the flavor is distributed evenly. In another large bowl, whisk together the eggs and whole milk if you are using it. The milk is optional, so the recipe can easily be adapted when needed.
Place the panko breadcrumbs on another large sheet of baking paper. Panko is particularly useful for achieving a crunchy chicken coating because its larger, airy flakes create more texture than many fine breadcrumbs. Once everything is prepared, the chicken can move through the coating stages efficiently without requiring a complicated setup.
The Easy Crumbing Method
Add all of the chicken strips to the seasoned flour at once. Toss the pieces thoroughly with your hands until every strip has a light, even coating. Shake away excess flour before transferring the chicken to the egg mixture. This helps prevent excessive clumps and gives the breadcrumbs a better surface to stick to.
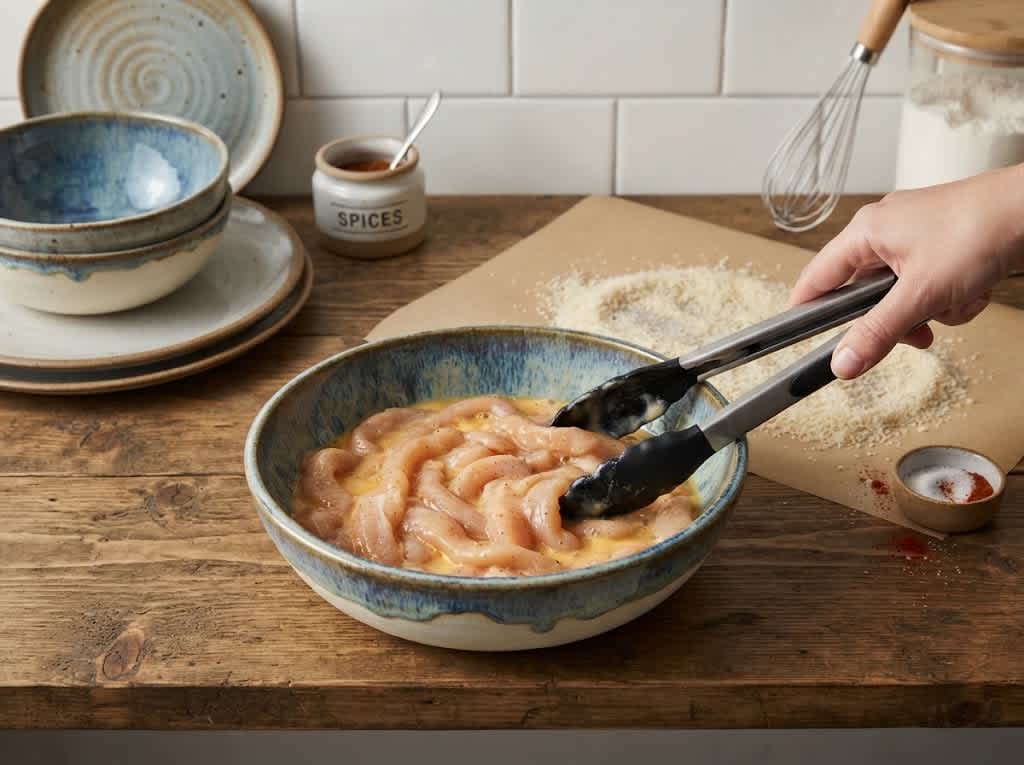
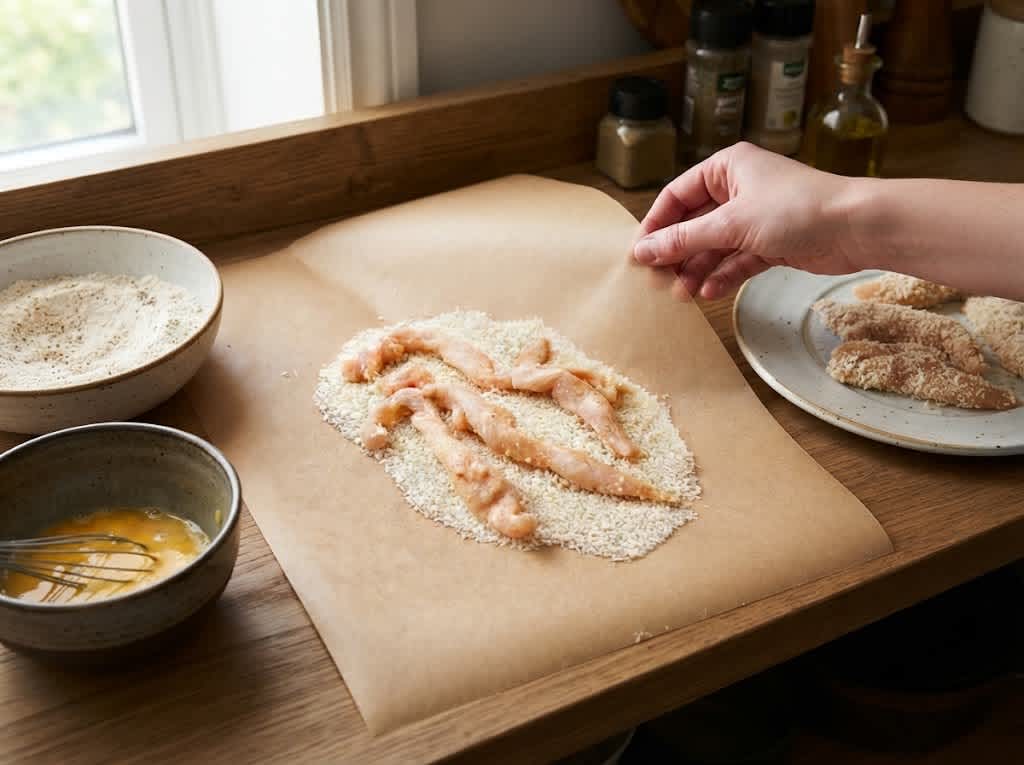
Once the chicken is in the egg mixture, use tongs to turn the pieces until they are completely coated. Work with several strips at a time when transferring them to the panko. Allow excess egg to drip away before placing the chicken onto the breadcrumbs. Then use the edges of the parchment paper to help move the panko over the chicken.
Gently press the breadcrumbs onto each strip so they adhere properly. Avoid pressing so firmly that the coating becomes compressed and heavy. A light but complete coating is enough to create a crisp crust during cooking. Once coated, place the chicken fingers on a clean plate and continue until all the pieces have been prepared.
How to Get a Crunchy Chicken Coating
A crisp coating depends on more than just breadcrumbs. The chicken needs to be properly coated, and the cooking temperature needs to be suitable. If shallow-frying, the oil should be heated over medium heat before the chicken goes into the pan. The oil should be hot enough to begin crisping the coating, but it should not be so hot that the outside becomes dark before the chicken is cooked through.
One useful technique is to avoid moving the chicken during the first 30 to 60 seconds in the pan. Allowing the coating to set before turning the chicken helps it remain attached. If the pieces are moved too early, the breading can sometimes shift or separate from the chicken. After the first side has developed a firm golden crust, turn the pieces carefully.
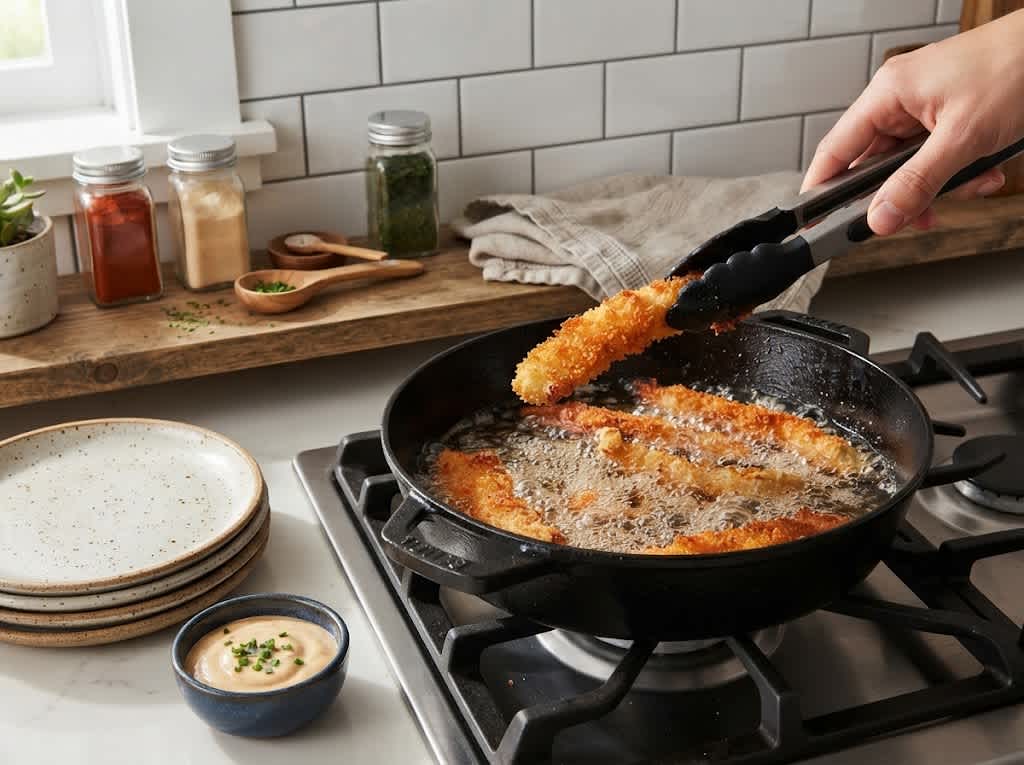
Do not overcrowd the frying pan. Cooking the chicken in batches gives each piece enough room to cook evenly and helps maintain a suitable oil temperature. Overcrowding can cause the chicken to steam instead of becoming crisp. After cooking, transfer the chicken fingers to a wire rack so excess oil can drain while air circulates around the coating.
Shallow-Fried Chicken Fingers
Shallow frying gives these homemade chicken fingers their deeply golden appearance and especially crunchy texture. Add enough oil to a large frying pan to come approximately 1 cm, or half an inch, up the side of the pan. Heat the oil over medium heat, then carefully add the coated chicken in batches.
Cook the chicken for approximately 3 to 4 minutes per side, depending on the thickness of the strips. The coating should become golden and crisp, while the chicken inside should be fully cooked. Because cooking times can vary according to the size of the chicken pieces and the heat of the pan, always check that the chicken is safely cooked through before serving.
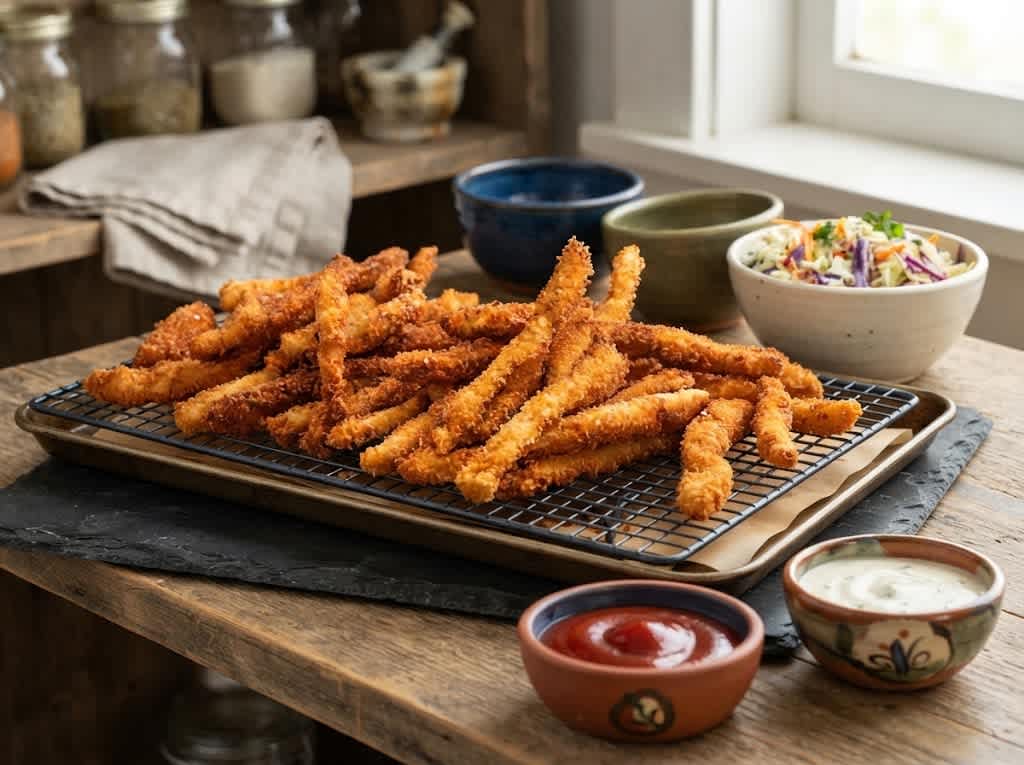
After each batch is finished, place the chicken fingers on a wire rack rather than directly onto a flat plate whenever possible. A wire rack allows air to circulate beneath the chicken and helps prevent the bottom of the crust from becoming soggy. Continue cooking the remaining pieces in batches until everything is golden and crisp.
Air Fryer Chicken Fingers
The air fryer provides a convenient way to cook these chicken fries with less oil. Preheat the air fryer to 200°C, or 400°F. Arrange the breaded chicken fingers in a single layer with a little space between each piece. Avoid stacking or overlapping the chicken because good air circulation is important for achieving a crisp coating.
Spray the chicken generously with oil before cooking. Air fry for approximately 8 to 10 minutes, turning the chicken halfway through the cooking time and giving it another light spray of oil. Depending on the size of your air fryer and the thickness of the chicken, you may need to cook the pieces in batches.
The air fryer method is especially useful when you want a quick dinner without standing over a frying pan. It also makes cleanup easier because there is no pan of hot oil to manage. The finished chicken fingers can still develop a crisp, golden coating while remaining tender inside.
What to Serve With Chicken Fingers
Crispy chicken fingers are extremely versatile, so you can build the rest of the meal around whatever your family enjoys. Coleslaw is a natural choice because its cool, crunchy texture contrasts with the hot, crispy chicken. Ketchup is another simple option, especially for children, while ranch dipping sauce provides a creamy and savory contrast to the seasoned breadcrumb coating.
You can also serve the chicken fries alongside a simple green salad, roasted vegetables, potato wedges, or another favorite side dish. For a casual family dinner, arrange the chicken fingers on a large serving platter with several dipping sauces. For lunch, they can be placed inside wraps or served with salad and a simple dressing.
Make-Ahead and Leftover Chicken Fingers
One of the convenient features of homemade chicken fingers is that they can be enjoyed beyond the first meal. If you have leftovers, allow them to cool and store them appropriately in the refrigerator. They can be reheated when you want another quick meal or snack.
For the best texture, reheating in an oven or air fryer is preferable to using a microwave alone. Dry circulating heat can help bring back some of the crispness of the breadcrumb coating. If using an air fryer, reheat until the chicken is hot throughout and the coating has become crisp again. Always make sure refrigerated leftovers are thoroughly reheated before serving.
How to Keep Chicken Fingers Tender
Chicken breast is naturally lean, so avoiding overcooking is important if you want tender chicken fingers. Cutting the chicken into evenly sized strips helps because the pieces finish cooking at a similar rate. Very thin pieces can dry out quickly, while unusually thick pieces may take longer to cook.
Another important point is to avoid using excessively high heat. When the oil is too hot, the breadcrumb coating can brown rapidly while the center of the chicken still needs more time. Medium heat gives the coating enough time to become golden while the chicken cooks through. When using an air fryer, arranging the strips in a single layer also helps them cook evenly.
Common Questions About Chicken Fingers
Can I use chicken thighs instead of chicken breast?
The recipe specifically uses boneless, skinless chicken breast, so that is the ingredient to follow for the original preparation. Chicken thighs have a different texture and fat content and may require different cooking times. If you make substitutions, cut the pieces evenly and ensure the chicken is completely cooked before serving.
Can I make these chicken fingers without frying?
Yes. The recipe includes an air fryer method specifically for a more convenient cooking option. Prepare and bread the chicken as directed, then arrange the pieces in a single layer in a preheated air fryer. Spray with oil and cook at 200°C, or 400°F, turning halfway through.
Why are my chicken fingers not crispy?
Several factors can affect crispness. The chicken may have been overcrowded during cooking, the oil may not have been hot enough, or the coating may not have adhered properly. With the air fryer method, insufficient oil spray or overlapping pieces can also reduce crispness. Giving each piece enough space is particularly important.
What dipping sauce goes with chicken fries?
Ketchup and ranch dipping sauce are included as serving suggestions, but chicken fingers work well with many sauces. You can serve them with your preferred dip depending on whether you want something creamy, tangy, sweet, or spicy.
A Simple Family-Friendly Chicken Dinner
These crispy chicken fingers combine straightforward ingredients with an easy coating method and two cooking options. The seasoned flour gives the chicken a savory base, the egg helps the panko stick, and the breadcrumbs create the crisp exterior that makes chicken fries so enjoyable. Because the recipe can be shallow-fried or air-fried, it can fit different cooking preferences without changing the ingredient list.
Whether you serve them with creamy coleslaw, ketchup, ranch dressing, or a simple salad, these homemade chicken fingers make a practical meal for busy days. The preparation can be organized efficiently by coating several pieces together, and the finished chicken can also be enjoyed as leftovers. With a crunchy outside, tender chicken center, and familiar seasoning, this is an easy chicken recipe to keep in your regular dinner rotation.
Crispy Chicken Strips Recipe
Golden, crunchy homemade chicken fingers made with seasoned chicken breast, panko breadcrumbs, and a simple egg coating.
4
servings20
minutes20
minutes40
minutesIngredients
600 g (1¼ lb) boneless, skinless chicken breast (see note 1)
75 g (½ cup) plain (all-purpose) flour
1 tsp sweet paprika
1 tsp garlic powder
1 tsp onion powder
1 tsp sea salt flakes
½ tsp freshly cracked black pepper
2 eggs
1 tbsp full-cream (whole) milk (optional, see note 2 for dairy-free)
120 g (2 cups) panko breadcrumbs
Oil, for frying (light olive oil, avocado oil, canola/rapeseed oil, or vegetable oil)
Directions
- If the chicken breasts are especially thick, slice them horizontally to create thinner pieces. Cut the chicken into long strips approximately 1.5 cm (½ inch) wide.
- Place a large sheet of baking or parchment paper on the work surface. Add the flour, sweet paprika, garlic powder, onion powder, sea salt flakes, and black pepper. Mix the dry ingredients thoroughly.
Whisk the eggs and whole milk together in a large bowl. Place the panko breadcrumbs onto another large sheet of baking paper. - Place all the chicken strips into the seasoned flour. Toss them thoroughly until every piece is evenly covered. Shake off excess flour before transferring the chicken to the egg mixture.
- Use tongs to turn the chicken through the egg mixture until each strip is completely coated. Allow excess egg to drip away before moving the chicken to the breadcrumbs.
- Work with several chicken pieces at a time. Place them onto the panko breadcrumbs and use the parchment paper to help toss the crumbs over the chicken. Gently press the breadcrumbs onto each piece so they adhere properly.
Continue until all the chicken has been coated, then place the prepared chicken fingers on a plate. - Add enough oil to a large frying pan to reach approximately 1 cm (½ inch) up the side of the pan. Heat over medium heat.
Cook the chicken in batches for approximately 3–4 minutes per side, or until golden, crisp, and cooked through. Leave the chicken undisturbed for the first 30–60 seconds after placing it in the pan. Transfer cooked chicken to a wire rack and continue with the remaining pieces. - Preheat the air fryer to 200°C (400°F). Arrange the chicken fingers in a single layer, leaving a little space between the pieces. Spray generously with oil.
Air fry for 8–10 minutes, turning halfway through and lightly spraying with oil again. Cook in batches when necessary. The chicken should be golden, crisp, and fully cooked. - Serve the crispy chicken fingers immediately with coleslaw, ketchup, and ranch dipping sauce.
Nutrition Facts
- Total number of serves: 1
- Calories: 540kcal
- Fat: 21g
- Carbohydrates: 50g
- Fiber: 4g
- Sugar: 4g
- Protein: 37g
