Here’s an even more detailed, rich, blog-style version with deeper flavor explanation, cooking science, pro tips, and serving ideas:
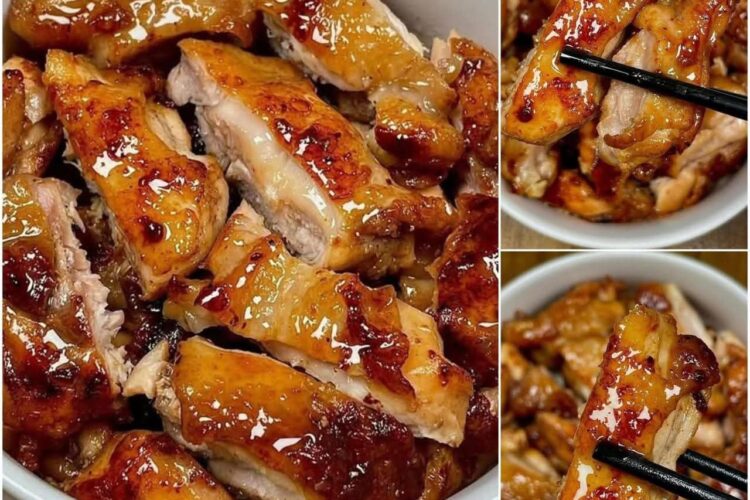
Sticky Honey Garlic Chicken
Sweet. Savory. Glossy. Better than takeout — and ready in 25 minutes.
This Honey Chicken is one of those timeless recipes that never goes out of style. It’s made with simple pantry ingredients, yet the flavor is bold, balanced, and incredibly satisfying. The combination of soy sauce, honey, garlic, and ginger creates a glossy glaze that clings perfectly to tender pieces of chicken.
What makes this recipe special is the texture — lightly caramelized edges on the chicken, coated in a thick, sticky sauce that’s sweet but not overpowering, savory but not salty. It’s comfort food with restaurant-quality results.
And the best part? It uses just a handful of ingredients and comes together in one pan.
What Makes This Recipe So Good?
- The honey caramelizes beautifully when heated.
- Soy sauce adds deep umami flavor.
- Vinegar balances sweetness with a slight tang.
- Garlic and ginger add warmth and aroma.
- Cornstarch creates that signature glossy glaze.
It’s a perfect balance of sweet, salty, tangy, and savory.
Ingredients
For the Chicken
- 1 lb (450g) chicken thighs or chicken breast, cut into strips or bite-sized pieces
- Salt and black pepper, to taste
- 1 tablespoon vegetable or olive oil
For the Honey Garlic Glaze
- ¼ cup soy sauce (low sodium recommended)
- ¼ cup honey (or brown sugar for a deeper caramel flavor)
- 2 tablespoons rice vinegar (or apple cider vinegar)
- 2 cloves garlic, minced
- 1 teaspoon fresh ginger, grated
- 1 teaspoon cornstarch + 1 tablespoon water (slurry)
Optional Garnish:
- Sliced green onions
- Sesame seeds
- Red chili flakes
Step-by-Step Detailed Instructions
Step 1: Prepare the Chicken Properly
Cut the chicken into evenly sized strips or cubes. Keeping pieces uniform ensures even cooking.
Pat dry with paper towels — moisture prevents browning. Season lightly with salt and pepper.
Why drying matters:
Dry chicken sears better and develops golden edges instead of steaming.
Step 2: Sear for Flavor
Heat oil in a large skillet over medium-high heat. When the oil is hot (but not smoking), add the chicken in a single layer.
Do not stir immediately. Let it cook undisturbed for 2–3 minutes to develop a golden crust.
Flip and cook another 2–3 minutes until:
- Nicely browned
- Almost cooked through
Remove and set aside.
Pro Tip: Don’t overcrowd the pan. Cook in batches if needed — crowded chicken releases moisture and won’t brown properly.
Step 3: Build the Sauce Base
In the same pan (without washing it), lower heat to medium and add:
- Soy sauce
- Honey
- Vinegar
- Garlic
- Ginger
Stir continuously and bring to a gentle simmer.
Let it bubble for 2–3 minutes. The honey will begin to slightly thicken and deepen in color.
Why this step matters:
Simmering allows the garlic and ginger to release their aroma into the sauce.
Step 4: Create the Glossy Glaze
Stir the cornstarch slurry again and slowly pour it into the simmering sauce while whisking.
Within 60–90 seconds, the sauce will thicken into a shiny glaze consistency.
You’re looking for:
- Thick but pourable
- Coats the back of a spoon
If too thick → add 1 tablespoon water.
If too thin → simmer 1–2 minutes longer.
Step 5: Coat & Caramelize
Return the chicken (and any juices) to the pan.
Toss well to coat every piece evenly.
Cook for 2–3 minutes more, allowing:
- The sauce to cling tightly
- The edges to caramelize slightly
- The glaze to become sticky and glossy
Do not overcook — just enough for everything to combine beautifully.
How It Should Look
✔ Shiny and glossy
✔ Thick glaze coating every piece
✔ Light caramelization around edges
✔ No watery sauce pooling in the pan
Serving Ideas
This honey chicken pairs beautifully with:
- Steamed jasmine rice
- Garlic fried rice
- Brown rice
- Stir-fried noodles
- Steamed broccoli or bok choy
For a complete meal bowl:
Rice + Honey Chicken + Steamed Veggies + Green Onions + Sesame Seeds
Flavor Variations
1. Spicy Honey Chicken
Add:
- 1 teaspoon sriracha
- Or ½ teaspoon chili flakes
2. Crispy Version
Lightly coat chicken pieces in 2 tablespoons cornstarch before searing for crispier edges.
3. Orange Honey Chicken
Add 2 tablespoons fresh orange juice to the sauce.
4. Extra Garlic Lovers
Use 4 cloves instead of 2.
5. Sesame Honey Chicken
Add 1 teaspoon sesame oil at the end for a nutty aroma.
Common Mistakes to Avoid
❌ Overcrowding the pan
❌ Adding too much salt (soy sauce is already salty)
❌ Skipping cornstarch (sauce won’t thicken properly)
❌ Cooking sauce on very high heat (can burn honey)
Storage & Meal Prep
- Store in an airtight container for up to 3 days in the fridge.
- Reheat gently on the stove with a splash of water.
- Freezes well for up to 2 months.
Perfect for meal prep lunches.
Why This Recipe Works Every Time
The balance of:
- Sweet (honey)
- Salty (soy sauce)
- Tangy (vinegar)
- Aromatic (garlic & ginger)
creates a complete flavor profile that satisfies every craving. It’s simple, dependable, and family-approved.
This Honey Garlic Chicken is sticky, saucy, comforting, and incredibly easy to make. Once you try it, don’t be surprised if it becomes a weekly dinner favorite in your home too.
