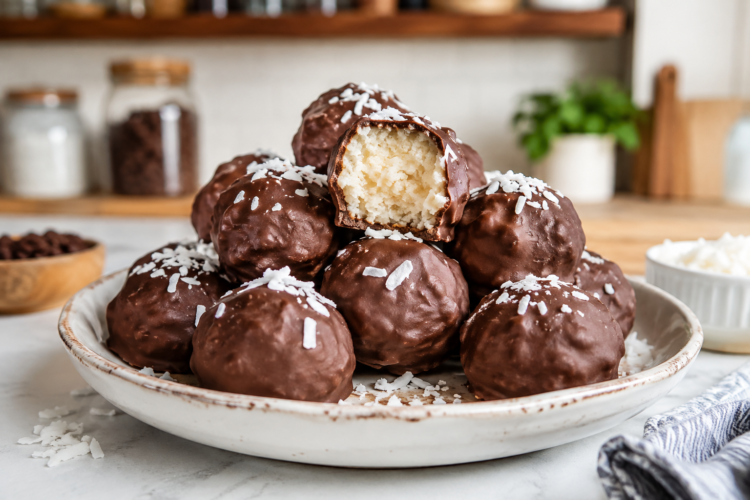
Chocolate Coconut Protein Balls are a simple no-bake snack that brings together rich chocolate, sweet coconut, and vanilla protein in one bite-sized treat. These easy homemade protein balls have a soft, chewy center made with unsweetened shredded coconut and a smooth chocolate coating that adds a satisfying finish. They are perfect when you want a sweet snack but also want something more filling than regular candy or cookies. Because there is no baking involved, the recipe is quick to prepare and easy to make in almost any home kitchen.
The combination of chocolate and coconut gives these protein balls a dessert-like flavor while keeping the preparation straightforward. Vanilla protein powder adds sweetness and helps increase the protein content, while raw honey provides flavor and helps hold the mixture together. Almond extract adds a subtle nutty note that works beautifully with the coconut. Once the mixture is shaped and chilled, each ball is coated in melted dairy-free chocolate for a rich outer layer that hardens as it cools.
One of the biggest advantages of this chocolate coconut protein balls recipe is convenience. The active preparation takes only a few minutes, while the freezer does most of the remaining work. The finished batch can be stored for later, making these no-bake protein balls a practical option for busy days. They can be enjoyed as an afternoon snack, a post-workout treat, or a small sweet bite whenever a chocolate craving appears.
The recipe makes eight protein balls, which provides four servings when two balls are considered one serving. According to the supplied nutrition information, each serving contains approximately 285 calories and 9 grams of protein. However, the exact nutritional values may vary depending on the protein powder and chocolate chips you use. Different brands can contain slightly different amounts of protein, carbohydrates, sugar, and calories.
Why These Chocolate Coconut Protein Balls Are So Easy to Make
No-bake snacks are popular because they require little equipment and no oven time. These coconut protein balls are prepared by mixing the ingredients, rolling the mixture into individual portions, chilling them, and coating them with chocolate. This simple method makes the recipe suitable for beginners and experienced home cooks alike. There are no complicated techniques, long baking times, or difficult cooking temperatures to manage.
The small size of the protein balls also makes them easy to portion. Instead of cutting slices from a large dessert, each snack is already prepared in an individual serving size. The recipe creates eight balls, allowing you to enjoy two at a time or save them for later. Their compact size also makes them easy to store in a container in the refrigerator or freezer.
Another reason this recipe works well is the combination of textures. The shredded coconut gives the center a chewy and slightly firm texture, while the chocolate coating creates a smooth outer shell. The difference between the cold chocolate exterior and soft coconut center makes these protein balls enjoyable to eat. The shredded coconut also gives the recipe a recognizable homemade texture rather than the smooth consistency of many store-bought protein snacks.
A Quick Look at This No-Bake Protein Snack
These Chocolate Coconut Protein Balls are ready in approximately 30 minutes, including the chilling time. The hands-on preparation requires about five minutes, followed by chilling in the freezer. This makes them a useful choice when you want a quick homemade snack without spending a long time preparing food.
The recipe uses a small group of familiar ingredients. Unsweetened shredded coconut forms the base, while vanilla protein powder contributes protein and sweetness. Raw honey helps bind the mixture, and almond extract adds flavor. Almond milk or another plant-based milk and a small amount of water provide the moisture needed to bring the dry ingredients together. The final chocolate coating is made with dairy-free chocolate chips and coconut oil.
These ingredients create a sweet snack with a rich coconut flavor. The finished protein balls are intentionally on the sweeter side, particularly because of the combination of honey, vanilla protein powder, coconut, and chocolate. Using unsweetened shredded coconut helps balance the sweetness and prevents the recipe from becoming overly sugary.
Understanding the Role of Each Ingredient
Unsweetened shredded coconut is one of the most important ingredients in this recipe because it provides both flavor and structure. It creates the chewy texture that gives these balls their characteristic coconut center. Choosing unsweetened coconut is important because the recipe already contains sweet ingredients. Sweetened coconut could make the finished protein balls much sweeter than intended.
Vanilla protein powder adds protein while also helping the mixture hold together. Protein powder absorbs moisture from the wet ingredients, which helps transform the coconut into a mixture that can be pressed and shaped. The exact texture may change depending on the type of protein powder used because every product absorbs liquid differently.
Raw honey serves as both a sweetener and a binding ingredient. Its thick texture helps the coconut and protein powder stick together. The almond extract gives the filling an additional layer of flavor without overpowering the coconut. Although only a small amount is used, it can make the overall taste more rounded and balanced.
Almond milk or another plant-based milk provides additional moisture. The tablespoon of water also helps bring the mixture together. The ingredients may look dry at first, but continued mixing gives the protein powder and shredded coconut time to absorb the liquid. This is an important part of achieving the right consistency.
Choosing the Right Protein Powder
The original version of this recipe uses vegan protein powder because plant-based protein blends often absorb a large amount of liquid. This absorbency helps create a mixture that holds its shape after rolling. Vanilla-flavored protein powder also complements the sweet coconut and chocolate flavors, creating a filling that tastes similar to a small homemade dessert.
Other types of protein powder can be used, but the texture may change. Whey protein, collagen powder, and other blends may not absorb liquid in the same way as a vegan protein powder. Because of this difference, the amount of moisture needed can vary. It is helpful to mix the ingredients thoroughly and pay close attention to the consistency before deciding whether the mixture needs additional handling.
Beef isolate protein powder can also work well for these coconut protein balls. When using it, chilling the mixture for approximately 5 to 10 minutes before rolling can help create a firmer consistency. The short resting period allows the protein powder and coconut to absorb more moisture. This can make the mixture easier to portion and shape.
How to Prepare the Coconut Protein Ball Mixture
Start by placing the unsweetened shredded coconut and vanilla protein powder in a large mixing bowl. Stir the dry ingredients together until the protein powder is distributed evenly. This helps ensure that every protein ball has a consistent texture and flavor.
Next, add the raw honey and almond extract. Mix well to spread the wet ingredients throughout the coconut and protein powder. The mixture may seem dry at this stage, but this is normal. Add the almond milk and water, then continue mixing until the ingredients begin to hold together.
The final mixture will not look exactly like traditional cookie dough. The shredded coconut creates a naturally textured consistency. The important thing is that the mixture can be pressed together without immediately falling apart. If the protein powder has absorbed the liquid slowly, continue mixing and give the ingredients a little time to combine.
Rolling and Chilling the Protein Balls
Prepare a tray by lining it with parchment paper. This prevents the protein balls from sticking and makes them easier to remove after chilling. Lightly coat your hands with coconut oil before shaping the mixture. This helps prevent the coconut mixture from sticking to your hands.
Divide the mixture into eight portions and roll each portion into a round ball. Keeping the portions similar in size makes the servings more consistent and helps the balls chill evenly. Place each finished ball onto the parchment-lined tray.
Once all eight balls have been shaped, place the tray in the freezer. Chilling is an important step because the balls need to become firm before they are covered in chocolate. If the filling is too soft, it can be difficult to coat without damaging the shape. The cold temperature helps the balls stay intact and allows the chocolate shell to set quickly.
Making the Chocolate Coating
The chocolate coating adds a rich and smooth finish to the coconut center. To prepare it, combine the coconut oil and dairy-free chocolate chips in a small pot. Melt them over medium-low to low heat while stirring until the mixture becomes smooth.
It is important to avoid high heat when melting chocolate. Excessive heat can cause the chocolate to burn or develop an uneven texture. Gentle heat and regular stirring help create a smooth coating that is easier to work with. Once the chocolate is completely melted, remove the chilled protein balls from the freezer.
The original instructions mention cacao butter during the chocolate-melting process, but cacao butter does not appear in the provided ingredient list. To keep the original ingredients unchanged, the recipe can be prepared using the listed dairy-free chocolate chips and coconut oil for the coating.
Coating and Setting the Protein Balls
Place the chilled protein balls carefully into the melted chocolate. Turn them gently so the surface becomes covered with the chocolate mixture. Because the balls are cold and firm, they should be easier to handle during this step.
Return the coated balls to the parchment-lined tray. Place the tray back in the freezer for approximately 5 to 10 minutes, allowing the chocolate to set. Once firm, the chocolate coating creates a smooth outer shell around the coconut center.
The finished protein balls can be enjoyed after a short thawing period. Allowing them to sit at room temperature for about five minutes makes them easier to bite. If you prefer a softer center, allow them to thaw for approximately fifteen minutes. The ideal texture depends on personal preference.
Flavor Variations and Topping Ideas
The original combination of vanilla, coconut, almond, and chocolate is delicious, but the flavor can be adjusted. For a stronger chocolate flavor, chocolate protein powder can be used instead of vanilla protein powder. This creates a double chocolate version with chocolate inside the filling and outside the protein ball.
A small sprinkle of salt can add contrast to the sweet flavors. If you enjoy sweet and salty desserts, this simple addition can make the chocolate taste even richer. Toppings can also be added while the chocolate coating is still slightly soft.
Extra shredded coconut works particularly well as a topping because it reinforces the coconut flavor and gives the finished balls a decorative appearance. Chopped pecans can add texture, while sprinkles can make the protein balls look more festive. The topping should be added before the chocolate has completely hardened so it can stick properly.
Notes for Getting the Best Texture
The type of protein powder used is one of the most important factors in this recipe. Every protein powder absorbs moisture differently, which means the mixture may not behave exactly the same when you change brands or protein types.
If the mixture is too dry, make sure it has been mixed thoroughly before making any changes. The coconut and protein powder may need time to absorb the honey, plant-based milk, and water. If using whey or collagen protein powder, add liquid carefully because these powders may not need as much moisture as a highly absorbent vegan blend.
If the mixture is too soft, chilling can help. Place the mixture in the refrigerator for 5 to 10 minutes before rolling. This is especially helpful when using beef isolate protein powder. Once chilled, the mixture may become firmer and easier to shape.
Storing Chocolate Coconut Protein Balls
These protein balls can be stored in the refrigerator for up to four days. Place them in a suitable container and keep them chilled so the chocolate shell remains firm. A single layer is helpful when possible to prevent the balls from sticking together or damaging the coating.
For longer storage, keep the protein balls in the freezer. This makes the recipe ideal for preparing ahead of time. When you are ready to eat them, remove the desired amount and allow them to thaw briefly.
A five-minute thawing period creates a firmer snack, while approximately fifteen minutes at room temperature produces a softer texture. You can also allow the protein balls to thaw gradually in the refrigerator. This can be useful when preparing a snack in advance.
Frequently Asked Questions
Are Chocolate Coconut Protein Balls a Good Snack?
These Chocolate Coconut Protein Balls provide approximately 9 grams of protein per serving based on the supplied nutritional information. They can be a satisfying homemade snack, especially when you want a combination of chocolate, coconut, and protein. Whether they suit an individual’s diet depends on personal nutritional needs and the specific brands of ingredients used.
Why Are My Protein Balls Not Sticking Together?
The most common reason is the type of protein powder. Different powders absorb liquid differently. Mix the ingredients thoroughly and allow the mixture time to absorb moisture. If necessary, chill the mixture before rolling to improve the texture and help it hold together.
Can I Use Another Plant-Based Milk?
Yes. The recipe uses almond milk or another plant-based milk. Hemp milk can also be used. The final texture may change slightly depending on the milk and protein powder, so make sure the mixture remains firm enough to shape.
Can These Protein Balls Be Made Ahead?
Yes. They are excellent for preparing in advance. Store them in the refrigerator for up to four days or freeze them for longer storage. Allow frozen protein balls to soften for a few minutes before eating.
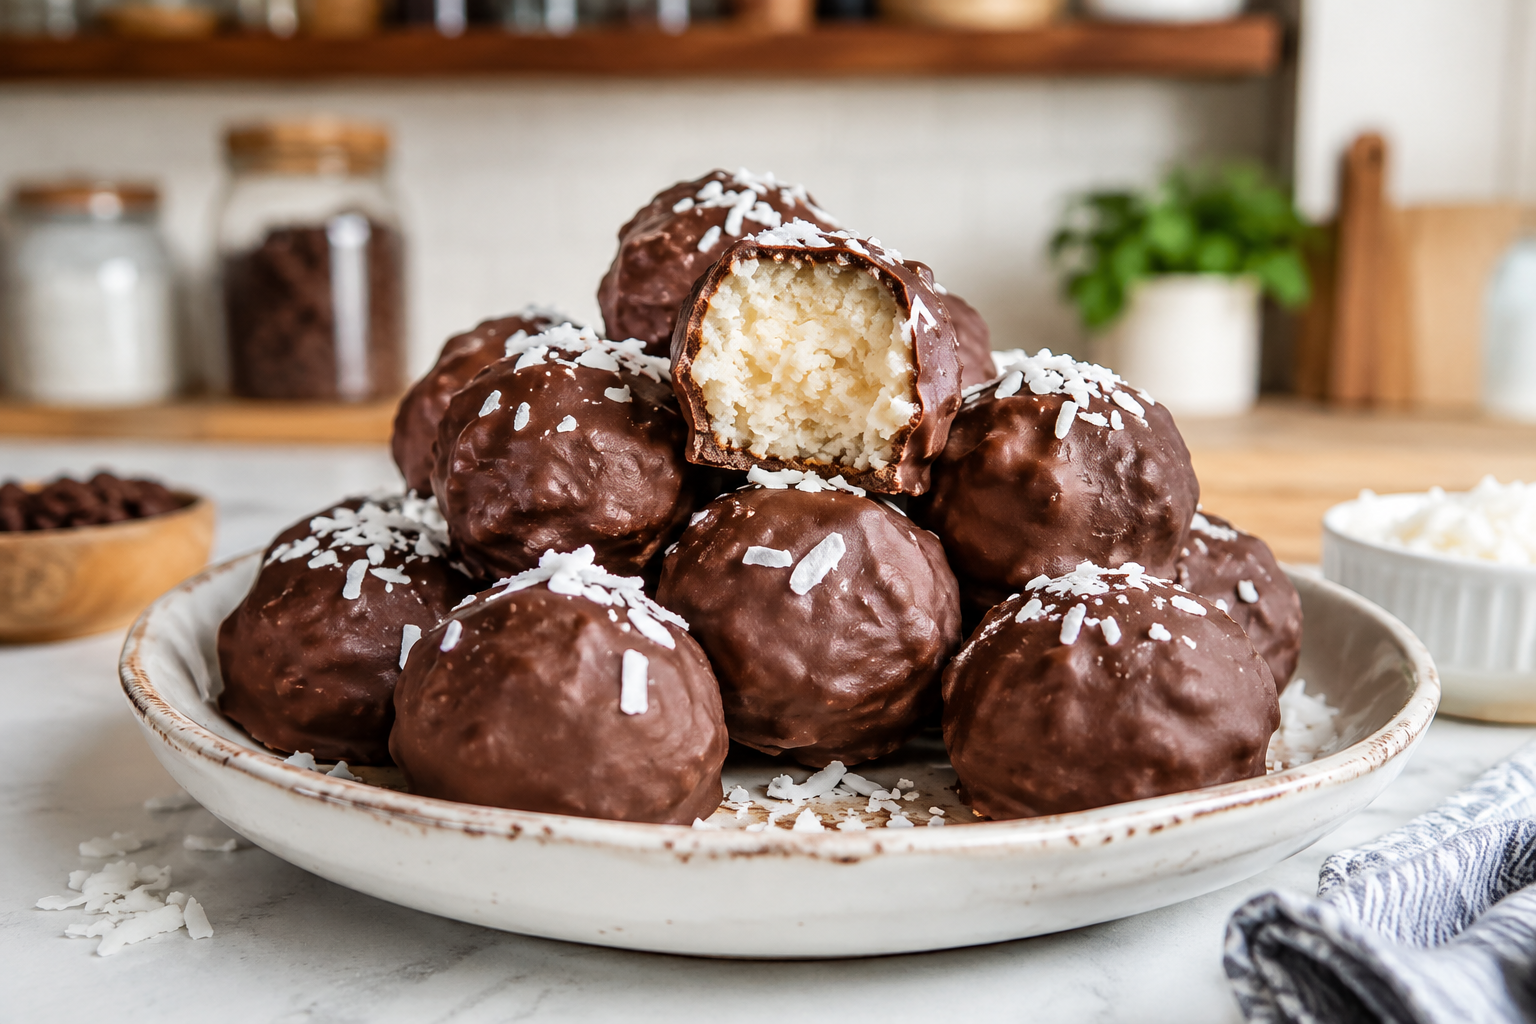
Chocolate Coconut Protein Balls
Rich, sweet, and easy to prepare, these no-bake Chocolate Coconut Protein Balls combine unsweetened shredded coconut, vanilla protein powder, raw honey, and almond extract.
4
servings5
minutes285
kcal25
minutes30
minutesIngredients
- For the Coconut Protein Balls
1 cup unsweetened shredded coconut
⅓ cup vanilla protein powder, approximately 1 scoop
⅛ cup raw honey
¼ teaspoon almond extract
3 tablespoons almond milk or any plant-based milk
1 tablespoon water
- For the Chocolate Coating
½ tablespoon coconut oil
3 tablespoons dairy-free chocolate chips
Directions
- In a large mixing bowl, add the unsweetened shredded coconut and vanilla protein powder. Stir until the protein powder is evenly distributed throughout the coconut.
- Measure the raw honey and add it to the bowl along with the almond extract. Mix thoroughly. The mixture may initially appear dry, which is normal.
- Pour in the almond milk or other plant-based milk, followed by the water. Mix well until the ingredients are fully combined and the mixture can be pressed together.
- Line a tray with parchment paper. Lightly grease your hands with a small amount of coconut oil to reduce sticking while shaping the protein balls.
- Divide the mixture into eight equal portions. Roll each portion between your hands to create small, round protein balls. Place the shaped balls on the prepared tray.
- Place the tray in the freezer and chill the protein balls until they are firm enough to handle easily.
- Add the coconut oil and dairy-free chocolate chips to a small pot. Melt over medium-low to low heat, stirring or whisking until the chocolate mixture is smooth.
- Remove the chilled protein balls from the freezer. Add them carefully to the melted chocolate and turn them until coated.
- Transfer the coated balls back to the parchment-lined tray. Return the tray to the freezer for approximately 5 to 10 minutes, or until the chocolate coating has set.
- Before eating, allow the frozen Chocolate Coconut Protein Balls to thaw for about five minutes for a softer texture.
Notes
- The recipe makes 8 protein balls, with 2 balls making 1 serving.
- Protein powders absorb liquid differently, so the final texture can vary depending on the type used.
- Vegan protein powder absorbs a large amount of liquid and works well for a firm mixture.
- When using whey or collagen protein, add the liquid ingredients gradually because these powders may require less moisture.
- Beef isolate protein powder can work well, but chilling the mixture for 5 to 10 minutes before rolling can help it hold together.
- For a double chocolate variation, use chocolate protein powder instead of vanilla protein powder.
- While the chocolate coating is still slightly tacky, extra shredded coconut, chopped pecans, or sprinkles can be added as toppings.
- Store leftover protein balls in the refrigerator for up to 4 days or freeze them for longer storage.
- Nutritional values may vary depending on the specific brands of protein powder and chocolate chips used.
Nutrition Facts
- Calories: 285kcal
- Fat: 21g
- Carbohydrates: 22g
- Fiber: 5g
- Sugar: 10g
- Protein: 9g
