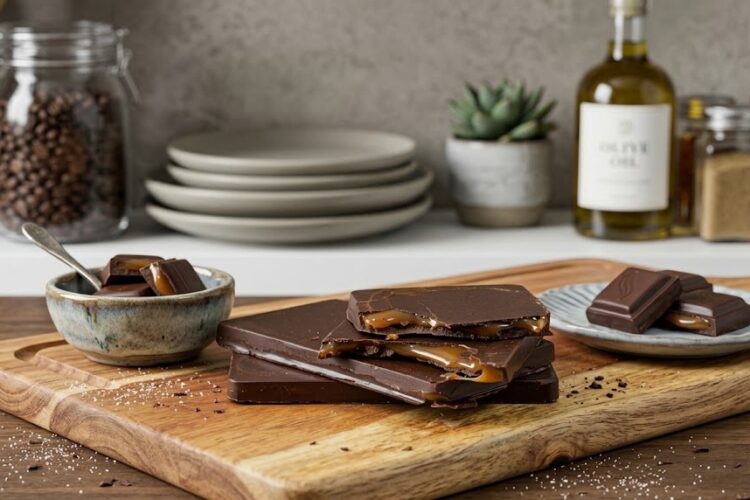
Keto Chocolate Caramel Bars are a delicious no-bake dessert for anyone who enjoys the classic combination of rich chocolate and smooth caramel while following a low-carb lifestyle. These homemade bars are simple to prepare and use only a few main ingredients. Each bar features a firm layer of sugar-free chocolate, a soft caramel center, and another layer of chocolate on top. The result is a satisfying dessert with a rich flavor and contrasting textures that can be enjoyed as a sweet snack, after-dinner treat, or make-ahead keto dessert.
One of the best things about this easy keto dessert recipe is that no baking is required. There is no need to prepare cake batter, preheat an oven, or wait through a long baking process. The recipe mainly involves melting the chocolate, spreading it into a chocolate bar mold, adding the caramel filling, and allowing the layers to chill. The refrigerator and freezer help create the final texture, making this recipe convenient for home cooks who want a homemade sugar-free dessert without complicated preparation.
The recipe makes eight individual bars, which makes portioning simple and convenient. Instead of preparing a large dessert and cutting it into separate pieces, the chocolate bar mold creates ready-made servings. Once the bars have fully set, they can be stored in the refrigerator or freezer and enjoyed whenever you want a rich chocolate caramel treat. Their individual size also makes them suitable for preparing ahead and keeping chilled for later.
Rich Chocolate and Smooth Caramel
Chocolate and caramel are a popular dessert combination because they offer different but complementary flavors and textures. The chilled chocolate layers provide a rich taste and firm bite, while the caramel center remains softer and smoother. This contrast creates a satisfying dessert without requiring complicated candy-making techniques. The three-layer structure also gives the bars an attractive appearance, with the caramel clearly surrounded by rich sugar-free chocolate.
The original recipe uses Lily’s Chocolate Chips, which are sugar-free and sweetened with Stevia. These chocolate chips are used to create both the bottom and top layers of the bars. Since chocolate is the main structural ingredient, melting it correctly is important. Sugar-free chocolate can become damaged if it is overheated, so heating it slowly in short intervals and stirring carefully helps maintain a smooth and spreadable consistency.
The Sugar Free Caramel Sauce creates the soft center that gives these keto chocolate caramel bars their distinctive flavor. After the bottom chocolate layer becomes firm, the caramel is added and chilled before the remaining chocolate is placed on top. This short chilling period helps keep the caramel separate from the chocolate and creates a cleaner layered appearance in the finished dessert.
Understanding the Main Ingredients
The first main ingredient is one cup of Lily’s Chocolate Chips. The melted chocolate is divided between the bottom and top layers, creating the outer shell of each bar. The chocolate needs to be melted until smooth enough to spread easily into the mold while still becoming firm once chilled. Since it forms the structure of the dessert, careful melting is one of the most important parts of the preparation process.
The second ingredient is one teaspoon of coconut oil. The original method begins by combining the chocolate chips with one-half teaspoon of coconut oil. The coconut oil helps create a smoother melted chocolate mixture that is easier to spread. The original ingredient quantity should be maintained because changing the amount can affect the consistency and final texture of the chocolate layers.
The third main ingredient is one-third cup of Sugar Free Caramel Sauce. This ingredient creates the smooth center of the dessert and adds the caramel flavor. Different sugar-free caramel sauces can vary in texture and nutritional values, so the final result may depend on the specific product used. A thicker caramel sauce may be easier to keep centered between the two chocolate layers.
How to Melt the Chocolate
Place the Lily’s Chocolate Chips and one-half teaspoon of coconut oil in a small microwave-safe bowl. Heat the mixture in the microwave on high for 30 seconds at a time, stirring thoroughly after each interval. The chocolate may continue melting while it is being stirred, so additional microwave time may not always be necessary.
Avoid overheating the chocolate. Sugar-free chocolate can become thick, grainy, or difficult to spread if it gets too hot. Heating it in short intervals gives you better control over the process. The total melting time may be approximately one minute, although microwave strength can vary. The best guide is the appearance of the chocolate. Stop heating when it becomes smooth after stirring and can flow easily from a spoon.
Creating the Chocolate and Caramel Layers
Once the chocolate is fully melted, spoon enough into the chocolate bar mold to cover the bottom of each section. Spread the chocolate into an even layer, making sure it reaches the corners and edges of the mold. Gently tap the mold on the counter to help the chocolate settle and level out.
Place the mold in the freezer for approximately five minutes or until the chocolate has become firm. It is important to allow the bottom layer to harden before adding the caramel. A firm chocolate base helps prevent the caramel from mixing into the melted chocolate and provides a stable foundation for the dessert.
After the chocolate has hardened, spread the Sugar Free Caramel Sauce evenly over the top. Avoid overfilling the mold because there still needs to be enough space for the final chocolate layer. Once the caramel has been added, return the mold to the freezer for another five minutes. Chilling the caramel helps create a stable center and makes the final layer easier to apply.
The remaining chocolate may begin to thicken while the caramel is chilling. If necessary, microwave it briefly for approximately 15 to 20 seconds and stir thoroughly. Spread the smooth melted chocolate over the caramel layer until it is completely covered. Gently tap the mold again to help create a more even surface.
Optional Sea Salt and Toppings
Maldon Sea Salt Flakes are an optional topping for these Keto Chocolate Caramel Bars. A light sprinkle over the final layer of melted chocolate can add a subtle salty contrast to the sweetness of the caramel and the richness of the chocolate. Add the sea salt before the chocolate becomes completely firm so that the flakes can stick to the surface.
Other optional toppings include nuts, unsweetened coconut flakes, unsweetened dried cranberries, strawberries, blueberries, chia seeds, sunflower seeds, and hemp seeds. These ingredients can add extra texture and flavor, but they can also change the nutritional values of the finished bars. If you are tracking calories or carbohydrates, include any optional toppings when calculating the nutritional information.
Chilling and Storing Keto Chocolate Caramel Bars
After adding the final chocolate layer, place the mold in the refrigerator for at least 30 minutes so the bars can harden completely. For a faster setting time, the mold can be placed in the freezer for approximately 10 minutes. Do not remove the bars from the mold until the chocolate is fully firm, as soft chocolate may bend, crack, or cause the layers to separate.
Once the bars have set, carefully remove them from the mold and enjoy them immediately or transfer them to a storage container. These homemade keto bars are best stored in the refrigerator or freezer because warm temperatures can cause the chocolate to soften. For longer storage, place them in a freezer-friendly container or bag and separate stacked bars with parchment paper if needed.
The most important steps for successful Keto Chocolate Caramel Bars are melting the chocolate carefully and allowing every layer enough time to chill. When prepared slowly and stored properly, the finished bars have a rich chocolate exterior, a smooth caramel center, and a satisfying layered texture. This simple no-bake keto dessert is an easy option for anyone looking for a homemade sugar-free chocolate treat that can be prepared in advance and enjoyed whenever a sweet craving appears.
These Keto Chocolate Caramel Bars are especially convenient because they can be prepared without a complicated cooking process. The recipe does not require baking, mixing a large batter, preparing multiple fillings, or using advanced dessert-making equipment. A simple chocolate bar mold, a microwave-safe bowl, and a spoon are enough to prepare the basic layers. This makes the recipe suitable for anyone who wants to make a homemade low-carb dessert with a simple method and minimal kitchen work.
The preparation is also divided into short and manageable stages. First, the chocolate is melted and used to create the bottom layer. After a brief chilling period, the caramel is added. The caramel is then chilled before the final chocolate layer is spread over the top. Although the recipe includes several chilling stages, these do not require constant attention. While the layers are setting, there is no need to continue stirring, cooking, or preparing additional ingredients.
Because the bars are made in individual sections, they can also be useful for portion control. Each section of the mold creates one ready-to-serve chocolate caramel bar. After the dessert has fully set, you can store all eight bars together and remove individual portions when needed. This simple storage method makes the recipe practical for preparing in advance rather than making a new dessert every time you want something sweet.
Tips for Creating Even Chocolate Layers
An even chocolate layer can help create a better-looking finished dessert. After adding the melted chocolate to the bottom of the mold, use the back of a spoon to spread it gently toward the edges. The chocolate does not need to be perfectly measured in every section, but a reasonably even layer provides a more stable base for the caramel filling.
Gently tapping the mold on the counter can also help the melted chocolate settle naturally. This step is useful after adding both the bottom and top chocolate layers. Tapping can help smooth the surface and allow the chocolate to move into small spaces around the mold. Avoid tapping too aggressively, especially after adding the caramel, because the goal is simply to level the chocolate rather than disturb the layers.
When adding the caramel, try to keep it away from the extreme edges if possible. Leaving enough space around the sides helps the top chocolate layer cover and seal the caramel more effectively. This can create a cleaner finished appearance when the bars are removed from the mold. The caramel does not have to be perfectly centered, but spreading it carefully can improve the final shape.
The top chocolate layer should completely cover the caramel. If parts of the filling remain exposed, gently spread the chocolate with a spoon until the caramel is covered. This final layer completes the bar and creates the rich chocolate surface. Once the chocolate has settled into an even layer, the bars are ready for the final chilling period.
Making Keto Chocolate Caramel Bars Ahead of Time
These easy keto chocolate bars are suitable for advance preparation because they need to be chilled before serving. You can prepare the recipe, allow the bars to set completely, and store them for later. This makes them a convenient homemade dessert for busy days, family gatherings, special occasions, or times when you simply want to keep a sweet low-carb treat available.
When preparing the bars ahead, make sure they have become completely firm before transferring them from the mold to a storage container. Soft chocolate may become damaged if handled too early. Once fully chilled, the individual bars are easier to remove and arrange inside a container.
Refrigerated bars are easy to keep ready for serving. An airtight container can help protect the dessert and maintain its texture. Since the chocolate and caramel layers are sensitive to warm temperatures, keeping the bars chilled helps them remain firm and prevents them from becoming too soft.
For longer storage, the individual bars can be placed in a freezer-friendly container or bag. If you stack several bars together, parchment paper between the layers can help reduce sticking. Because the recipe creates individual portions, you can remove only the number of bars you want instead of defrosting an entire large dessert.
Enjoying the Bars Straight from the Refrigerator
The serving temperature can affect the texture of Keto Chocolate Caramel Bars. When the bars are served directly from the refrigerator, the chocolate is usually firm and provides a clean bite. The caramel remains softer than the chocolate, creating a noticeable contrast between the layers. This chilled texture is one of the main characteristics of this simple no-bake dessert.
If the bars have been stored in the freezer, they may be firmer immediately after removal. Allowing a frozen bar to soften slightly can create a softer texture before eating. The exact result may depend on the specific sugar-free chocolate and caramel sauce used, but keeping the dessert chilled is generally the best way to preserve its shape.
The individual size of the bars also makes serving simple. Each bar is already portioned, so there is no need to cut or slice the dessert before eating. They can be served directly on a small plate or enjoyed as a quick homemade chocolate snack.
Common Mistakes to Avoid
One common mistake when making these sugar-free chocolate caramel bars is overheating the chocolate. Heating chocolate for too long without stirring can cause it to become thick or grainy. The best approach is to use short 30-second intervals and stir thoroughly after each interval. Residual heat may continue melting the chocolate even after the bowl has been removed from the microwave.
Another mistake is moving to the next layer before the previous one has become firm enough. The bottom chocolate should be hardened before adding the caramel, and the caramel should be chilled before adding the top chocolate. Skipping or shortening these stages too much can cause the layers to blend together and affect the appearance of the finished bars.
Overfilling the mold can also make the final layer more difficult to add. Leave enough room after spreading the caramel so that the remaining chocolate can completely cover the filling. A balanced amount of chocolate and caramel helps create a better structure and makes the individual bars easier to remove after chilling.
Finally, do not try to remove the bars from the mold while they are still soft. Fully chilled chocolate is more likely to maintain its shape during unmolding. If the bars do not release easily, allow them to chill longer before trying again. A flexible mold can make the process easier because the bars can be gently pushed upward from underneath.
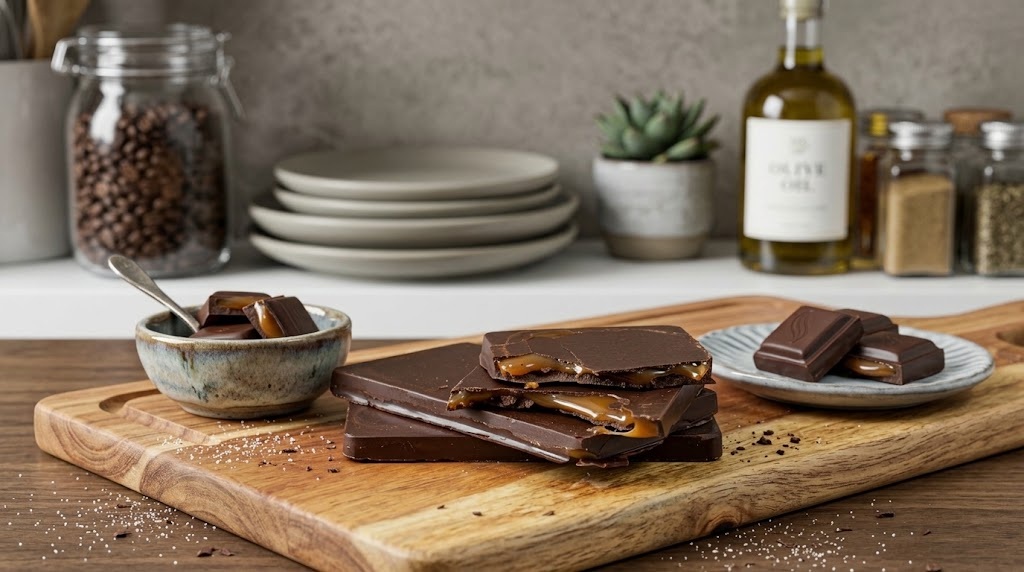
Keto Chocolate Caramel Bars Recipe
Easy no-bake Keto Chocolate Caramel Bars made with sugar-free chocolate, coconut oil, and a smooth sugar-free caramel center.
8
servings10
minutes1
minute20
minutes31
minutesIngredients
1 cup Lily’s Chocolate Chips, sugar free and sweetened with Stevia
1 tsp coconut oil
1/3 cup Sugar Free Caramel Sauce
Directions
- Add the Lily’s Chocolate Chips and 1/2 teaspoon of the coconut oil to a small microwave-safe bowl.
- Microwave the chocolate on high for 30 seconds at a time, stirring well after every interval. Continue only until the chocolate is fully melted and smooth. Avoid overheating, as burned or overcooked chocolate may become unusable.
- Spoon and drizzle enough melted chocolate into the bottom of the chocolate bar mold to create an even base layer. Spread the chocolate evenly, then gently tap the mold on the counter to help the chocolate settle.
- Place the mold in the freezer for approximately 5 minutes, or until the chocolate layer has hardened.
- Add an even layer of Sugar Free Caramel Sauce over the hardened chocolate. Return the mold to the freezer for another 5 minutes so the caramel layer can set.
- If the remaining melted chocolate has become firm, microwave it for approximately 15 to 20 seconds, stirring carefully until smooth. Do not overheat.
- Spread the remaining melted chocolate over the chilled caramel layer, using enough chocolate to cover the filling and fill the mold.
- If desired, lightly sprinkle the top with Maldon Sea Salt Flakes.
- Place the bars in the refrigerator for at least 30 minutes to harden completely. For faster setting, place them in the freezer for approximately 10 minutes.
- Once the bars are fully firm, gently remove them from the chocolate bar mold and serve.
Notes
- Do not overheat the sugar-free chocolate. Heat it in short microwave intervals and stir between each interval.
- Allow the chocolate and caramel layers to set before adding the next layer for the best appearance and texture.
- Store the finished bars in the refrigerator or freezer, particularly in warm conditions.
- Optional toppings may include nuts, unsweetened coconut flakes, unsweetened dried fruit, chia seeds, sunflower seeds, hemp seeds, or Maldon Sea Salt Flakes.
- The final nutrition will vary according to the exact brands and products used.
