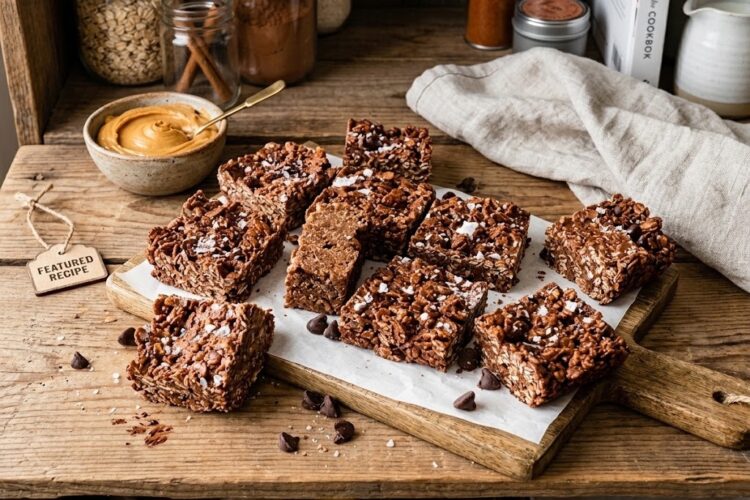
No-Bake Peanut Butter Chocolate Crunch Bars are an easy homemade dessert made with chocolate chips, creamy peanut butter, crispy rice cereal, coconut oil, vanilla, and a little flaky sea salt. These simple chocolate crunch bars have a delicious combination of smooth chocolate, rich peanut butter, and light, crispy cereal in every bite.
Because the recipe does not require an oven, it is an excellent choice when you want a quick homemade sweet treat without spending much time in the kitchen. The finished bars can be chilled in the refrigerator or freezer, making them convenient to prepare ahead of time for snacks, lunchboxes, parties, or unexpected chocolate cravings.
Why These No-Bake Chocolate Crunch Bars Are So Easy
One of the best things about these no-bake chocolate bars is how little preparation they require. Instead of mixing a traditional cake or cookie dough and waiting for the oven to heat, you simply melt the chocolate with coconut oil, stir in peanut butter and the remaining ingredients, fold in the crispy rice cereal, and chill the mixture until firm. The entire process is straightforward enough for beginner cooks, while the finished result looks and tastes like a special homemade confection. It is an especially useful recipe when you want something sweet without complicated baking equipment or techniques.
A Perfect Chocolate and Peanut Butter Combination
Chocolate and peanut butter are a classic pairing for good reason. The chocolate brings a deep, sweet flavor, while creamy peanut butter adds richness and a slightly nutty taste that makes the bars more satisfying. In this recipe, the peanut butter is blended directly into the melted chocolate mixture, creating a smooth coating around the crispy rice cereal. Every bite combines creamy chocolate peanut butter flavor with a delicate crunch. A small amount of flaky sea salt helps balance the sweetness and gives the finished bars a pleasant sweet-and-salty flavor.
The Secret to the Crispy Texture
The crispy rice cereal is what gives these homemade crunch bars their distinctive texture. Once it is gently folded into the chocolate and peanut butter mixture, the cereal becomes coated without losing its satisfying crispness. It is important to stir carefully rather than crushing the cereal, because keeping the pieces intact helps create a lighter and crunchier bar. The contrast between the smooth chocolate coating and crisp rice cereal makes these treats especially enjoyable. If you love desserts with a crunchy texture, this simple combination is an easy one to add to your regular recipe collection.
Why a No-Bake Dessert Is So Convenient
No-bake desserts are particularly useful when you want a homemade treat but do not want to spend a lot of time baking. There is no need to preheat the oven, prepare baking sheets, or monitor a cake or cookie while it cooks. For these peanut butter chocolate bars, the only real cooking step is briefly melting the chocolate chips and coconut oil. Once everything is mixed together, the refrigerator or freezer does the rest of the work. This makes the recipe convenient for busy days, warm weather, quick family desserts, and simple entertaining.
How to Melt the Chocolate Smoothly
Melting the chocolate properly is an important step because it creates the base for the entire recipe. The chocolate chips and coconut oil should be placed in a microwave-safe bowl and heated in short 30-second intervals. Stir between intervals and continue until the mixture becomes smooth. Using short heating periods helps prevent the chocolate from overheating. Once melted, the chocolate should have a glossy, fluid consistency that makes it easy to combine with the peanut butter, vanilla extract, and flaky sea salt. Taking a little care during this step helps produce a smooth finished texture.
Adding Peanut Butter for Extra Richness
After the chocolate and coconut oil are melted, creamy peanut butter is stirred into the mixture along with pure vanilla extract and flaky sea salt. The peanut butter adds more than just flavor; it also contributes to the rich, smooth consistency of the chocolate mixture. Vanilla extract rounds out the flavors, while the sea salt keeps the sweetness from becoming overwhelming. Stir everything together until the mixture is evenly combined. The result should be smooth enough to coat the cereal thoroughly, ensuring that each piece receives some of the chocolate peanut butter mixture.
Folding in the Crispy Rice Cereal
The crispy rice cereal should be added after the chocolate mixture is completely smooth. Gently folding it into the mixture is preferable to vigorous stirring because the cereal can break apart easily. The goal is to coat the cereal evenly while keeping as much of its natural crunch as possible. Continue mixing until there are no large areas of plain cereal and the chocolate mixture is distributed throughout. This step only takes a short time, but it determines the texture of the finished bars, so gentle handling is worthwhile.
Preparing the Pan for Easy Removal
For convenient preparation, a 9×5-inch loaf pan can be lined with parchment paper before adding the mixture. The parchment creates a simple barrier between the chocolate bars and the pan, making the set mixture easier to lift out when it is ready to cut. If a loaf pan is not available, an 8×8-inch pan can also be used. Depending on the pan size, the finished bars may have slightly different thicknesses. Pressing the mixture into an even layer helps the bars chill consistently and makes cutting them into neat portions easier.
How to Set the Chocolate Crunch Bars
Once the cereal mixture has been transferred to the prepared pan, press it into an even layer. The mixture should be compact enough to hold together after chilling, but there is no need to press it excessively hard. Sprinkle a little additional flaky sea salt over the top for extra flavor and a finished appearance. Place the pan in the freezer for about 15 minutes, allowing the chocolate mixture to firm up. The short chilling time is one reason these bars are such a practical option when you need a dessert quickly.
Cutting Homemade Crunch Bars
After the bars have set, remove them from the pan and use a sharp knife to cut them into portions. Twelve servings are listed for this recipe, although the exact size of each piece can be adjusted according to preference. For smaller snack-sized portions, cut the mixture into more pieces. For a more substantial dessert, make fewer, larger bars. A sharp knife helps create cleaner cuts through the firm chocolate and crispy cereal. If the bars have become very firm in the freezer, allowing them to sit briefly before cutting can make the process easier.
When to Serve Peanut Butter Chocolate Bars
These no-bake peanut butter chocolate crunch bars can be served in many different situations. They make an easy afternoon snack, a simple after-dinner dessert, or a sweet addition to a lunchbox. Because they can be prepared ahead of time, they are also convenient for parties, family gatherings, casual celebrations, and holiday dessert trays. Their compact size makes them easy to portion and serve. Keeping a batch chilled means you can have a homemade chocolate treat available whenever you want something sweet without starting another baking project.
A Convenient Make-Ahead Dessert
One major advantage of this recipe is that the bars can be prepared in advance. Once completely set, they can be stored in an airtight container in the refrigerator for up to two weeks. This makes them useful for meal preparation and planned snacks. You can prepare the bars on a quiet day and keep them ready for the week ahead. They are also suitable for freezer storage, giving you an even longer option when you want to prepare several batches or save some for a later chocolate craving.
Refrigerator and Freezer Storage
Proper storage helps the bars maintain their texture and flavor. For refrigerator storage, place the finished bars in an airtight container and keep them chilled for up to two weeks. For longer storage, they can be kept in the freezer for up to one month. Keeping the container sealed helps protect the bars from absorbing odors from other foods and helps maintain their quality. If freezing, arranging the bars carefully inside the container can also make it easier to remove individual portions when needed.
Making the Recipe Gluten-Free
These chocolate crunch bars can fit into a gluten-free dessert plan when a certified gluten-free crispy rice cereal is used. Not every crispy rice cereal product is necessarily gluten-free, so checking the package label is important if gluten avoidance is required. The remaining listed ingredients should also be checked according to individual dietary needs and product labels. This simple adjustment can make the recipe useful for people looking for an easy gluten-free sweet treat while still preserving the chocolate, peanut butter, and crispy texture that make these bars appealing.
Why These Bars Work for Different Occasions
The straightforward ingredient list makes these bars suitable for both everyday and special occasions. They require only a handful of pantry staples and do not depend on complicated decorating or presentation. The combination of chocolate, peanut butter, crispy cereal, and flaky sea salt provides enough contrast to make the dessert feel satisfying without requiring additional toppings. Whether you are preparing snacks for your family or putting together a dessert selection for guests, these bars offer a practical option that can be prepared quickly and stored until needed.
Common Preparation Mistakes to Avoid
Although the recipe is simple, a few small details can affect the final result. Overheating the chocolate may make it difficult to work with, which is why short microwave intervals are recommended. Stirring the cereal too aggressively can crush it and reduce the desired crunch. Another common issue is failing to press the mixture into an even layer, which can lead to unevenly shaped pieces after chilling. Finally, cutting the bars before the chocolate has fully set can make them difficult to portion cleanly. Following each step in order helps produce better results.
Notes for the Best Results
Keep the Cereal Crisp
Add the crispy rice cereal only after the chocolate mixture has been fully combined. Fold gently so the cereal remains as intact as possible. The more carefully it is handled, the more noticeable the crisp texture will be in the finished bars.
Use Short Microwave Intervals
Chocolate can become overheated if microwaved continuously. Heating in 30-second intervals and stirring between each interval gives you better control and encourages an even, smooth mixture.
Chill Until Firm
The bars need enough time to set before cutting. Freezing for approximately 15 minutes provides a quick setting method, but if the mixture still feels soft, allow it to chill a little longer until firm enough to handle.
Store in an Airtight Container
For the best storage quality, keep the finished bars in an airtight container. Refrigerated bars can be stored for up to two weeks, while frozen bars can be stored for up to one month.
Check Cereal Labels for Gluten-Free Preparation
If you need a gluten-free dessert, choose gluten-free crispy rice cereal and check the labels of the ingredients you purchase. This is especially important for anyone following a strict gluten-free diet.
Frequently Asked Questions About No-Bake Crunch Bars
Can I make these chocolate crunch bars without an oven?
Yes. This recipe is specifically designed as a no-bake dessert, so there is no oven required. The chocolate and coconut oil are simply melted in the microwave, the remaining ingredients are mixed in, and the finished mixture is chilled until firm. This makes the recipe particularly convenient when you want a quick homemade dessert without traditional baking.
How long do no-bake peanut butter bars last?
When stored correctly in an airtight container in the refrigerator, these bars can last for up to two weeks. They can also be frozen for up to one month. Proper storage helps maintain their flavor and texture while protecting them from moisture and unwanted refrigerator or freezer odors.
Can I freeze chocolate crunch bars?
Yes. These bars are freezer-friendly and can be stored in the freezer for up to one month. Freezing is useful when you want to prepare them ahead of time or keep a batch available for future snacks. Store them in an airtight container to help preserve their quality.
Why are my bars not firm enough?
If the bars are still soft, they may simply need additional chilling time. The chocolate mixture needs to firm up before the bars can be cut cleanly. Make sure the mixture has been pressed into an even layer and chilled until solid enough to handle. Refrigerator temperatures and pan thickness can affect how quickly the bars set.
A Simple Homemade Treat Worth Keeping in Your Recipe Collection
No-Bake Peanut Butter Chocolate Crunch Bars combine everything that makes a simple dessert appealing: minimal preparation, familiar ingredients, rich chocolate flavor, creamy peanut butter, and plenty of crispy texture. They are quick enough for an everyday snack but tasty enough to serve at gatherings. Since the bars can be refrigerated or frozen, they are also convenient for preparing ahead. With no complicated baking process and only a short chilling period, this recipe is an easy way to keep homemade chocolate treats ready whenever the craving arrives.
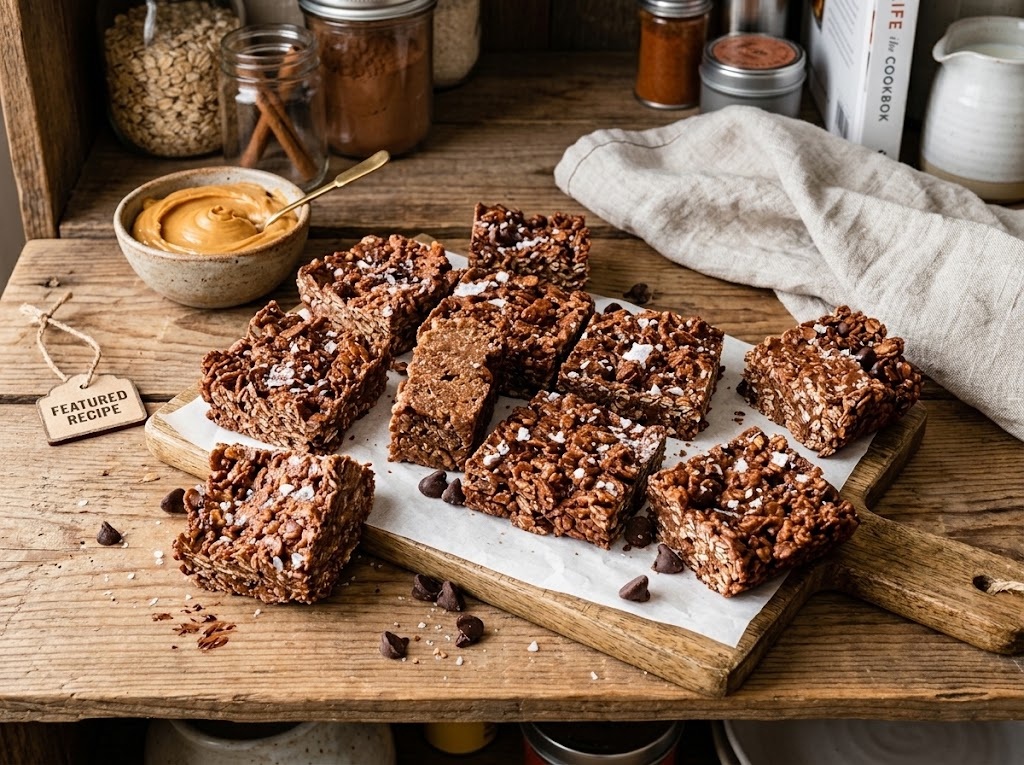
No-Bake Chocolate Peanut Butter Crunch Bars
These No-Bake Peanut Butter Chocolate Crunch Bars are crisp, chocolatey, rich, and lightly salted. Made with chocolate chips, creamy peanut butter, crispy rice cereal, coconut oil, vanilla extract, and flaky sea salt, they come together quickly without an oven.
12
servings25
minutes1
minute123
kcal26
minutesIngredients
1 cup chocolate chips
2 teaspoons coconut oil
1/3 cup creamy peanut butter
1 teaspoon pure vanilla extract
2 cups crisp rice cereal
1/4 teaspoon flaky sea salt, plus more for sprinkling
Directions
- Line a 9×5-inch loaf pan with parchment paper. An 8×8-inch pan can be used as an alternative.
- Place the chocolate chips and coconut oil in a large microwave-safe bowl. Microwave in 30-second intervals, stirring between each interval, until the chocolate mixture is completely smooth.
- Add the creamy peanut butter, pure vanilla extract, and 1/4 teaspoon flaky sea salt. Stir until everything is thoroughly combined and smooth.
- Gently fold the crisp rice cereal into the chocolate mixture. Continue folding until the cereal is evenly coated while taking care not to crush the cereal.
- Transfer the mixture to the prepared pan and press it into an even layer.
- Sprinkle additional flaky sea salt over the surface.
- Place the pan in the freezer for 15 minutes, or until the chocolate mixture is firm and set.
- Remove the chilled mixture from the pan and use a sharp knife to cut it into 12 bars or preferred portions.
Notes
- Store the finished bars in an airtight container in the refrigerator for up to 2 weeks.
- For longer storage, keep them in an airtight container in the freezer for up to 1 month.
- For a gluten-free version, use gluten-free crisp rice cereal and check ingredient labels as needed.
- Heat the chocolate in short intervals to avoid overheating.
- Fold the cereal gently to preserve its crispy texture.
Nutrition Facts
- Calories: 123kcal
- Fat: 7g
- Carbohydrates: 14g
- Fiber: 1g
- Sugar: 10g
- Protein: 3g
