Simple & Easy If you’ve ever wanted to bake homemade bread without complicated techniques, this no-knead gluten-free bread is the perfect place to start. Unlike traditional wheat dough, gluten-free dough doesn’t require kneading at all—just mix, rest, and bake. The result is a rustic artisan-style loaf with a soft, moist interior and a beautifully crisp crust, perfect for toast, sandwiches, or enjoying warm with butter.Recipes
Dry Ingredients
- Gluten-free flour blend (2½ cups): Provides structure. Must contain xanthan gum or similar binder.
- Salt (1½ tsp): Controls yeast growth and enhances flavor.
- Sugar or honey (1 tbsp): Feeds yeast + improves browning.
- Yeast (2¼ tsp): Creates rise and airy texture.
Wet Ingredients
- Warm water (1½ cups): Hydrates flour and activates yeast.
Correct temperature is crucial: too hot kills yeast, too cold slows rise. - Oil (2 tbsp): Adds moisture and softness.
- Apple cider vinegar (1 tsp): Strengthens crumb structure and improves rise in gluten-free dough.
Equipment Explained (Why Each Helps)
- Large bowl: Allows dough to expand during fermentation.
- Spatula or spoon: Gluten-free dough is sticky; hands aren’t ideal.
- Dutch oven: Traps steam, creating crust + oven spring.
- Parchment paper: Prevents sticking and makes transferring dough safe.
Step-by-Step Method With Detailed Guidance
Step 1 — Combine Dry Ingredients Properly
Whisk flour, salt, sugar, and yeast together for at least 30 seconds.
Why: Even yeast distribution prevents uneven rising and dense patches.
Step 2 — Add Liquids Gradually
Pour in warm water, oil, and vinegar slowly while stirring.
Mix until:
- No dry flour pockets remain
- Dough is thick, sticky, and elastic-looking
Correct texture: thicker than cake batter, softer than traditional dough.
If dough seems:
- Too dry: add 1–2 tbsp warm water
- Too runny: add 1–2 tbsp flour blend
Step 3 — Fermentation (The Flavor Stage)
Cover bowl loosely and place in a warm area (75–85°F / 24–29°C).
Choose your timing:
| Rise Time | Result |
|---|---|
| 2–3 hrs | Mild flavor, quick bread |
| 8–12 hrs | Deep flavor, airy texture |
Signs dough is ready:
- Slightly expanded
- Surface bubbles
- Yeasty aroma
Step 4 — Preheat for Professional Crust
Place Dutch oven (with lid) inside oven and preheat to 450°F (230°C) for 30 minutes.
Why this matters:
Hot pot + trapped steam = instant crust formation + maximum rise.
Skipping this step results in pale, soft crust.
Step 5 — Gentle Shaping
Lay parchment paper on counter. Scrape dough onto it.
With wet hands:
- Fold edges toward center once or twice
- Shape into round mound
Do not knead or press down.
Step 6 — Baking Process
Carefully remove hot pot.
- Lift parchment with dough and place inside
- Cover with lid
- Bake 35 minutes covered
- Remove lid
- Bake 10–15 minutes uncovered
Visual doneness signs
- Deep golden brown top
- Firm crust
- Hollow sound when tapped
Internal temperature (optional check): 205–210°F (96–99°C)
Step 7 — Cooling (Critical Step Most People Skip)
Transfer bread to rack and cool minimum 1 hour.
Cutting early causes:
- gummy interior
- compressed crumb
- sticky slices
Cooling allows starches to set and crumb to stabilize.
Texture & Flavor Profile
- Crust → crisp, crackly, rustic
- Interior → tender, moist, slightly chewy
- Taste → mild with subtle tang (thanks to vinegar + fermentation)
Troubleshooting Guide
| Problem | Cause | Fix |
|---|---|---|
| Dense loaf | Dough too dry | Add more water next time |
| Flat bread | Over-hydrated dough | Add more flour |
| Gummy inside | Sliced too early | Cool longer |
| No rise | Yeast inactive | Check water temp |
Flavor Variations
Seeded Artisan Loaf
Add 2–3 tbsp mixed seeds before rising.
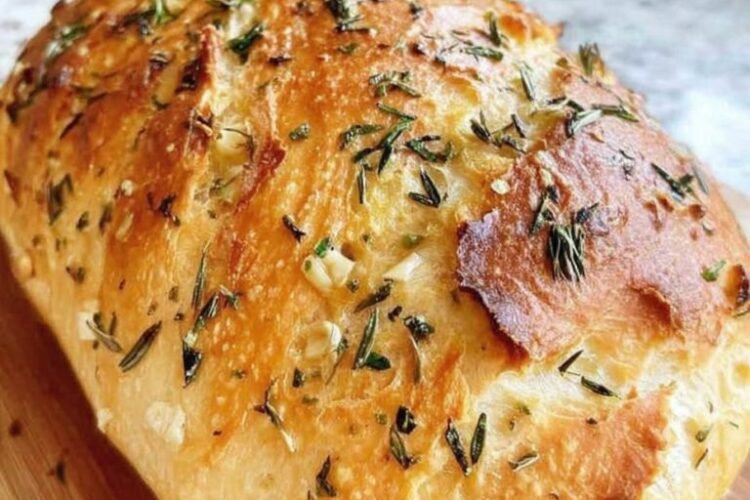
Herb Rustic Bread
Mix in:
- rosemary
- thyme
- garlic powder
Savory Sandwich Bread
Add:
- onion powder
- black pepper
- grated dairy-free cheese
Serving Ideas
- Breakfast toast with butter
- Sandwich base
- Soup companion
- Olive oil dip bread
- French toast base
Storage & Shelf Life
| Storage Method | Time |
|---|---|
| Room temp (wrapped) | 2 days |
| Refrigerator | 5 days |
| Freezer (sliced) | 2 months |
Freezing tip: freeze slices with parchment between them so they don’t stick.
Pro Baker Secrets
- Resting dough overnight dramatically improves texture.
- Slightly wetter dough = lighter crumb.
- Baking stone under Dutch oven improves bottom crust.
- Spritz oven walls with water before baking for extra steam (optional).
