A Complete Step-by-Step Guide to Perfect Homemade English Muffins
English muffins are a timeless breakfast staple—versatile, comforting, and full of character. With their signature nooks and crannies, lightly crisp exterior, and soft, chewy interior, they’re perfect for butter, jam, honey, peanut butter, or savory toppings like eggs and cheese.
While store-bought versions are convenient, homemade English muffins bring superior flavor, texture, and satisfaction. This guide walks you through every step, from ingredients and fermentation to stovetop cooking and serving.
Whether you’re a beginner or an experienced baker, this recipe will help you achieve bakery-quality results at home.
What Are English Muffins?
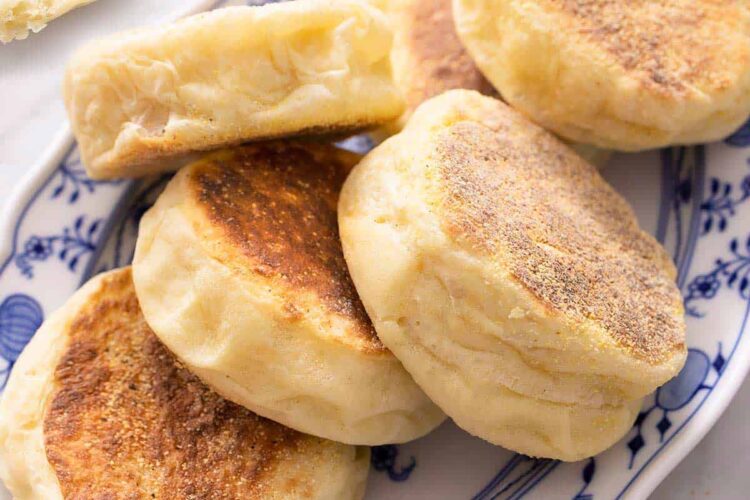
Despite the name, English muffins aren’t baked like traditional muffins. They are yeast-leavened bread rounds cooked on a griddle or skillet, giving them a golden exterior while keeping the inside soft and airy.
Originating in England as “toaster crumpets,” the modern version became popular in the U.S. in the late 19th century. Their defining feature is the interior full of holes, ideal for holding melted butter and spreads.
Why Make English Muffins at Home?
Making English muffins from scratch offers:
- Superior flavor – Fresh muffins have a richer, more complex taste.
- Better texture – More pronounced nooks and crannies.
- Control over ingredients – No preservatives or unnecessary additives.
- Customizable – Adjust sweetness, use whole wheat, or add toppings.
- Cost-effective – Often cheaper than premium store-bought options.
Once you try homemade, it’s hard to go back to the store-bought kind.
Ingredients for English Muffins
Basic Ingredients
- All-purpose flour – Structure and softness
- Milk – Adds richness and moisture
- Water – Hydrates the dough
- Yeast – Provides rise and airy texture
- Sugar – Feeds the yeast and adds subtle sweetness
- Salt – Enhances flavor
- Butter or oil – Adds tenderness and flavor
- Cornmeal or semolina – Prevents sticking and adds texture
Ingredient Notes
- Yeast: Instant or active dry yeast works. Dissolve active dry yeast in warm liquid first.
- Milk: Whole milk gives the best flavor; low-fat milk can be used.
- Cornmeal: Essential for the classic look and texture of English muffins.
Equipment You’ll Need
- Mixing bowl or stand mixer
- Measuring cups and spoons
- Rolling pin
- Biscuit cutter or round cutter
- Baking sheet
- Parchment paper
- Cast-iron skillet or griddle
- Spatula
Tip: English muffins are unique among yeast breads—they don’t require an oven.
English Muffins Recipe (Step-by-Step)
Ingredients
- 3 ½ cups all-purpose flour
- 2 ¼ tsp instant yeast
- 1 tbsp sugar
- 1 tsp salt
- ¾ cup warm milk
- ½ cup warm water
- 2 tbsp melted butter or oil
- Cornmeal or semolina, for dusting
Step 1: Prepare the Dough
- In a large bowl, combine flour, yeast, sugar, and salt.
- In a separate bowl, mix warm milk, warm water, and melted butter (100–110°F / 38–43°C).
- Gradually add the liquid to the dry ingredients until a soft, slightly sticky dough forms.
Step 2: Knead the Dough
- Knead on a lightly floured surface 8–10 minutes until smooth and elastic.
- Stand mixer with dough hook: 5–6 minutes on medium speed.
- The dough should be soft, not sticky. Add flour sparingly to avoid dense muffins.
Step 3: First Rise
- Place the dough in a lightly greased bowl, turning once to coat.
- Cover with a towel or plastic wrap.
- Let rise 1–1½ hours, until doubled.
This develops flavor and airy texture.
Step 4: Roll and Cut the Muffins
- Gently punch down dough and turn onto a floured surface.
- Roll to ½ inch thickness.
- Cut with a 3–3½ inch round cutter. Avoid twisting the cutter.
- Place muffins on a cornmeal-dusted baking sheet, sprinkle tops with cornmeal.
Step 5: Second Rise
- Cover loosely with a towel and rise 30–45 minutes.
- Muffins should appear puffy but not over-expanded.
This creates the light interior English muffins are known for.
Step 6: Cook on the Griddle
- Heat a cast-iron skillet or griddle over low to medium-low heat. Lightly grease if needed.
- Place muffins on the griddle, leaving space between them.
- Cook 6–8 minutes per side until golden brown.
Tip: Cooking slowly ensures the inside cooks without burning the exterior.
Step 7: Cool Completely
- Transfer to a wire rack to cool fully.
- Cutting too early may result in gummy texture.
How to Split English Muffins Properly
- Use a fork to gently pry apart for maximum nooks and crannies.
- Avoid using a knife, which can crush the interior.
Tips for Perfect English Muffins
- Low and slow cooking – ensures even cooking inside
- Don’t over-flour – prevents dense muffins
- Use a fork to split – preserves texture
- Cool fully before storing or toasting
- Patience pays off – English muffins reward careful attention
Variations and Add-Ins
- Whole Wheat: Replace up to 50% flour for nuttier flavor
- Sourdough: Use starter instead of yeast for tangy muffins
- Cinnamon Raisin: Add 1 tsp cinnamon + ½ cup raisins
- Savory: Mix in herbs, shredded cheese, or garlic powder
Serving Suggestions
- Toasted with butter and jam
- Breakfast sandwiches
- Topped with avocado and eggs
- Alongside soups or stews
- Mini pizza bases
Sweet or savory, English muffins are highly versatile.
Storage and Freezing
Storage
- Airtight container at room temperature for up to 2 days
Freezing
- Split first, freeze in a sealed bag for up to 3 months
- Toast directly from frozen
Troubleshooting Common Problems
- Dense muffins: Dough too dry or under-proofed
- Burnt outside, raw inside: Heat too high
- Flat muffins: Over-proofed second rise
- Few nooks and crannies: Cut with a knife instead of fork
Final Thoughts
Homemade English muffins take more time than store-bought, but the soft, chewy interior, crisp edges, and irresistible nooks and crannies are worth it.
By following this guide, you can confidently make muffins that rival any bakery or café. Once mastered, experiment with flavors, flours, and fermentation to create your own unique versions.
There’s a special satisfaction in pulling warm muffins off the griddle and watching butter melt into every crevice—a small joy that makes homemade baking so rewarding.
